This post contains helpful tips and tricks! If you’re in a rush, please use the “Jump to Recipe” above! Jump to:💭Why you’ll love this recipe 📋 Ingredients & tips 👩🏽🍳 How do you make a berry galette from scratch? 🍴 Serving & storage suggestions 📖 Recipe💬 Comments
💭Why you’ll love this recipe
Let’s face it, we’ve all been in a rush and needed to get a quick dessert on the table.
Only 15 minutes prep time - You can use premade pie crust or storebought pie crust (whatever is easiest for you) and it only takes 15 minutes of active workUses fresh or frozen berries - I love using fresh berries in the summer, but the good news is that this recipe works just as well with frozen berries tooEasily customizable - you can adjust the sweetness, flakiness, and filling ratio to make this recipe how you’d best like your galette!
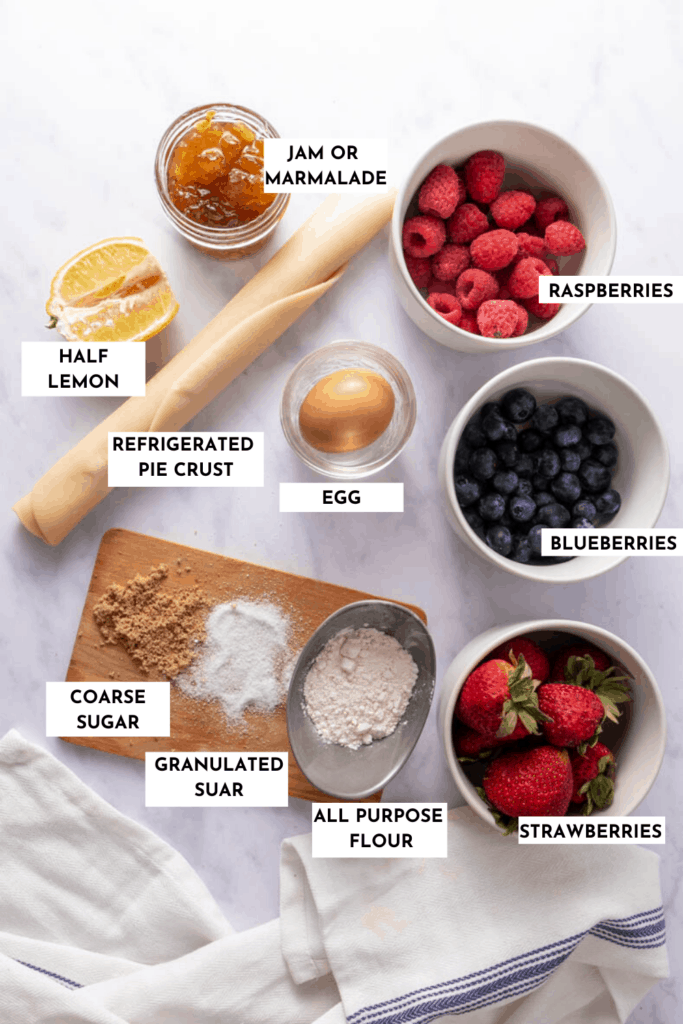
📋 Ingredients & tips
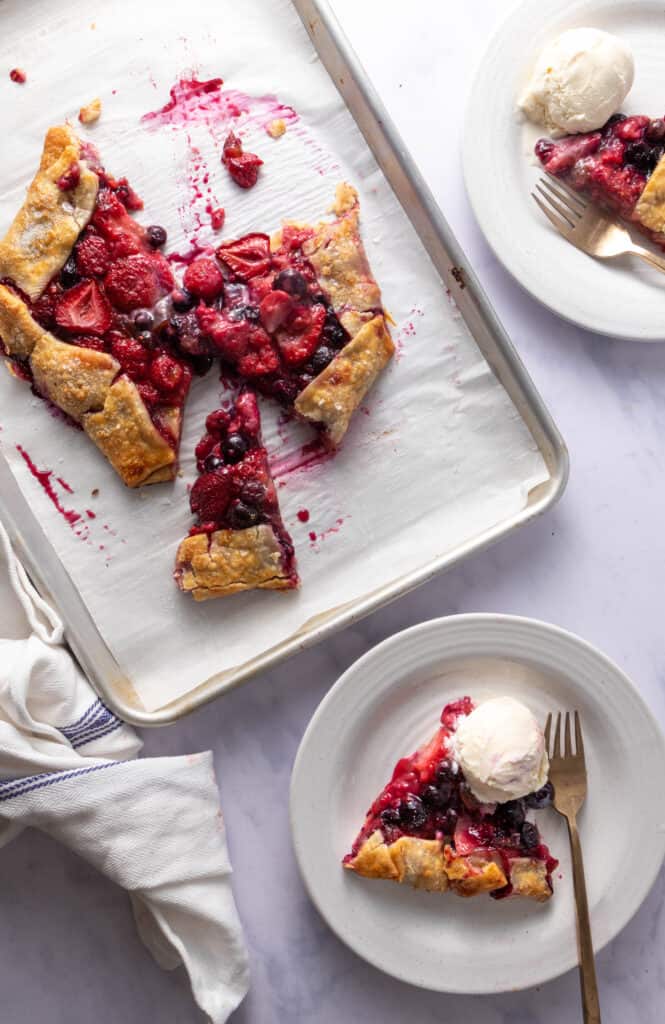
A galette is a free form pie typically made with some type of fruit. I love summer because we get all sorts of berries. Here in the Northwest, we get strawberries, blueberries, raspberries everywhere, so I’ve used all of them here.
Pie crust: you can either use a storebought crust or you can make one from scratch. But I wanted an easy recipe so you make it on a moment’s notice if someone invited you to a BBQ now (or if you’re like me and forget dessert for Thanksgiving). I’ve used storebought pie crust (Trader Joe’s brand). You can find these next to the dairy section, refrigerated or frozen. Please note that some of the popular brands tend to use lard, which is not vegetarian. Trader Joe’s is vegetarian but not vegan while Marie Callender’s and Wholly Wholesome are both vegan.
Berries: I’ve used a mix of ½ cup each strawberries, blueberries and raspberries. You can make the recipe with all of them, you can make it with just one of them. Oh, blackberries, apples, peaches and even cherries could work with this dessert (what a wildcard!)
You can use frozen or fresh berries (I prefer fresh berries in the summer). No need to thaw the berries if you’re using the frozen version either. Just pop them straight in.
Secret Ingredient, Jam: When you just add a bunch of berries to the pie crust, they tend to sweat out while baking. This typically ends up in a soupy mess (I’ve had to scoop them back out to make jam). Then, one day, I thought, what if I just added the jam to the base? And oh boy, it worked so beautifully.
Secret Ingredient 2, Egg Wash: This is what takes storebought crust to the next level. I whisk an egg together. Then, once I’ve folded the pie edges, I brush the tops with the egg wash. Then, I sprinkle a bit of coarse sugar on the edges to give it a bit more oomph. Never fails to impress!
Secret Ingredient 3, Flaky Sea Salt: When I take the galette out of the oven, I almost always sprinkle some flaky sea salt (like Maldon’s) on the crust. I can’t even begin to describe how much it transforms the taste! It adds a much needed note of saltiness!
Note: I’ve found spices tend to work with some of the other fruits, but not necessarily with berry galettes, so I don’t use any spices or seasonings in my galette. But you can add those in if you prefer a bit of a kick (for instance, some cinnamon or nutmeg with apples or cardamom with peaches).
👩🏽🍳 How do you make a berry galette from scratch?
I love the rustic nature of the galette - you don’t need a ton of “folding” experience, and it tastes just as delicious when it comes out of the oven.
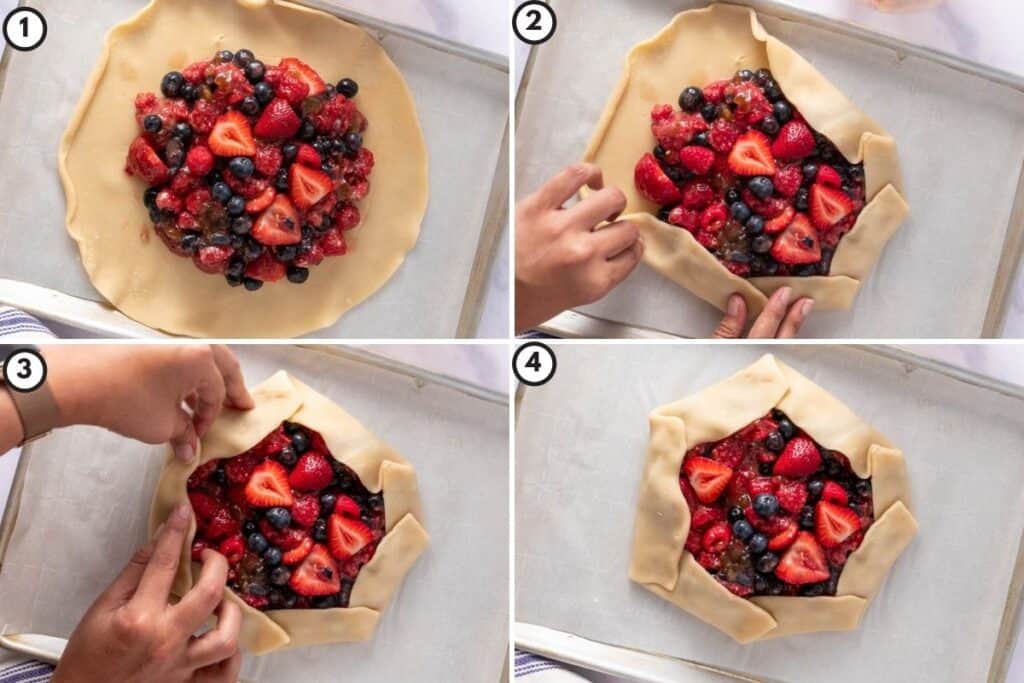
Prepare the berry filling and fold the galette
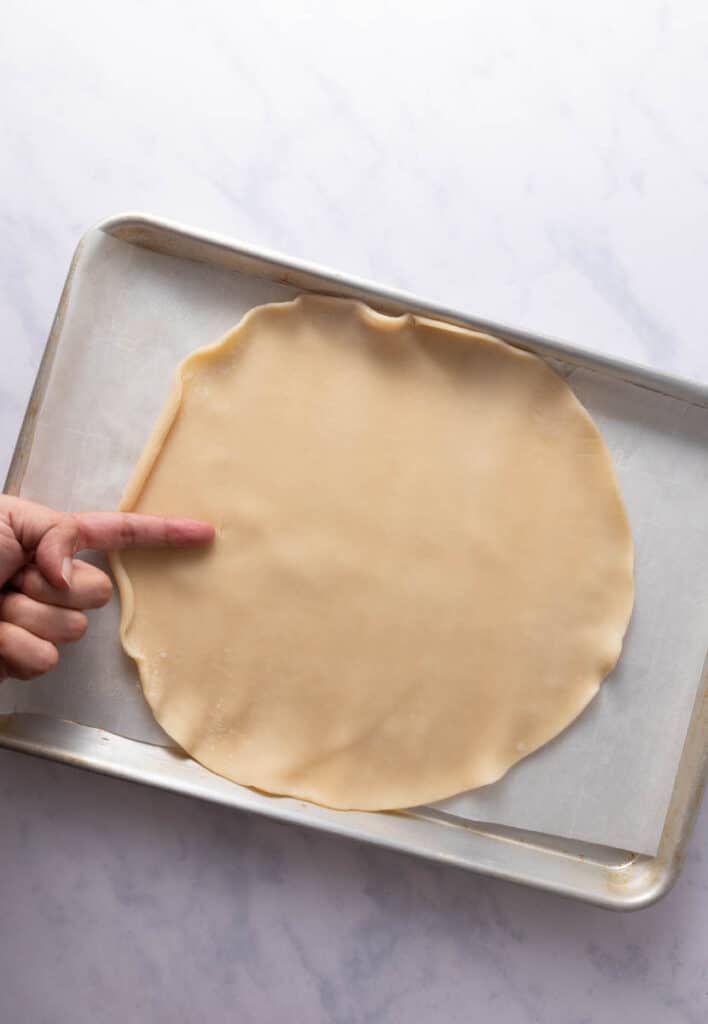
To prepare the filling, I add granulated sugar (with some Turbinado but any sugar would do), and a small squeeze of lemon juice. You can add vanilla extract to give it a nice nutty flavor and toss them together. Then, add flour and toss them to give them some structure. You’ll want to leave about 2" of space on all sides to ensure that there’s enough pie crust to fold over. 2" is roughly the length to the second joint of your index finger (see below) Fold the corners in, pinching occasionally to create the galette
Brush the folded galette with egg wash
Once the galette is folded, I typically brush it with egg wash to encourage the golden brown you see on perfect, rustic galettes. I also sprinkle some sugar on the crust to get that crisp texture - you can even add almonds!
🍴 Serving & storage suggestions
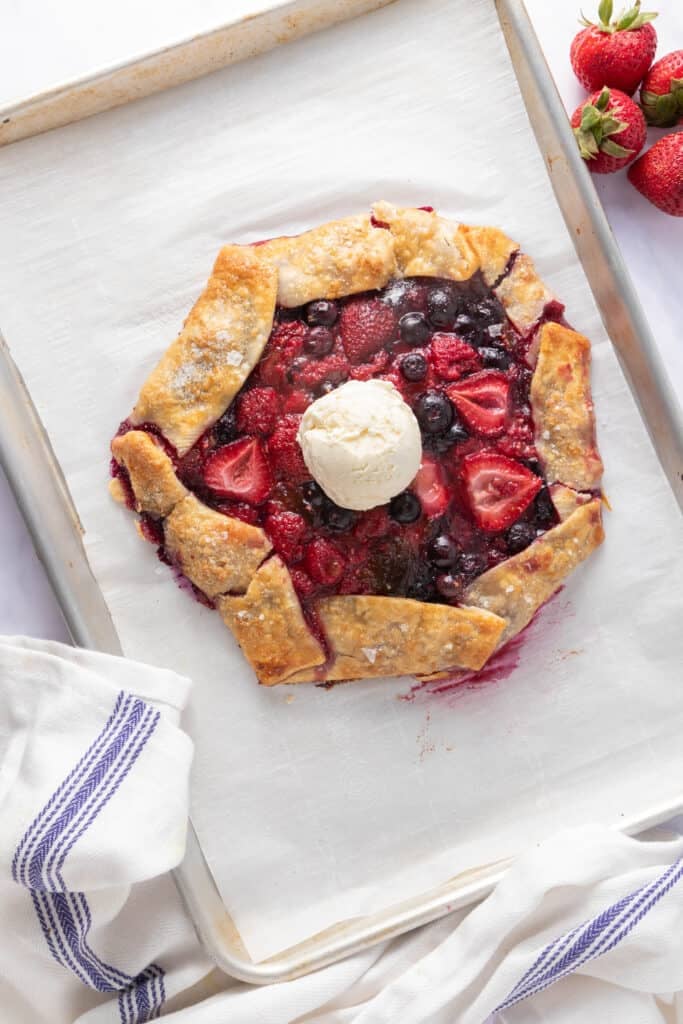
I love to serve this summer berry galette with a big dollop of vanilla ice cream and sometimes, a few sprigs of mint. Something about the freshness just elevates the galette to a whole new level. This is a perfect summer dessert because you can make this easy galette hours ahead of when you need it (or you can make these delicious kitchen sink cookies). If so, transfer to a cooling rack 5 to 10 minutes after it’s done baking. Then, set the oven to warm while you’re about to start dinner or BBQ. Pop the galette in to warm up, then serve with a dollop of ice cream when you’re ready for dessert. I try to eat this galette the day it’s made because it’s freshest then. Plus, it’s super simple to make so I suggest making it fresh when you want to eat it. You could loosely cover it with a lid and leave it in a cool place (not the fridge) at room temperature for a day or two more (but the bottom of the pie crust might end up getting soggy). If you tried this recipe, don’t forget to comment and rate! ⭐⭐⭐⭐⭐ If you’re looking for other simple summer BBQ friendly desserts - check out the following:
📖 Recipe
Note: This post was originally published 27 June 2020, and updated on 21 November, 2020 with additional information on pie crusts and recipe notes