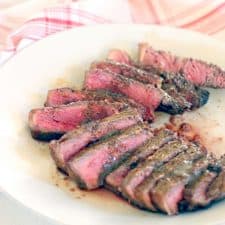
And you only need THREE ingredients (plus salt and pepper) for the whole thing. Behold: the Perfect Pan-Seared Steak with Browned Butter Pan Sauce, in all it’s glory:
Wipe that drool off your face and keep reading (then RUN to the grocery store to get the ingredients). Let’s start from the beginning, shall we? Here are nine steps/tricks to making a perfect steak that won’t break the bank.
Tips and Tricks for the BEST pan-seared steak
Use a cast iron skillet. If you don’t have one, I beg you to reconsider this important life decision. Inexpensive, virtually indestructible, and super versatile, my cast iron skillet is my all-time favorite cooking tool. The reason why it’s perfect for cooking this steak is that it can get searing hot, which is essential for developing a proper crust on your steak. If you don’t have one and you need steak NOW, you’d be able to use another heavy bottomed skillet (such as stainless steel). Just make sure you don’t use non-stick: you have to get the pan too hot to safely use a pan with a non-stick coating.
Choose the right cut. I usually buy New York Strip- in my opinion, it’s the best for the price. I’m far too frugal of a person to be buying the really pricey cuts of steak, but I’m far too snobby of a cook to use the real cheap stuff (and I don’t want to sit through my whole meal gnawing through tough meat!). Rest assured, you can certainly use other cuts of steak with this technique, depending on how frugal/snobby you are :-) Look for a cut of meat that is about 1-inch thick (this will ensure a crusty, seared outside but a tender inside that doesn’t get overcooked) and has fat marbled throughout. You want to avoid large “stripes” of fat running through the center of the meat (but around the outside is fine). The marbled fat will disperse throughout the meat and make it super tender, but large pieces of fat won’t break down and will remain tough.
Let the meat come to room temperature. Set the meat on a plate and allow it to warm up a bit before cooking. This will do two things: a) ensure even cooking, and b) allow some of the liquid to be released from the steak. If the meat is too wet, it won’t get as nice of a sear on the outside. Allow the meat to sit out for a minimum of fifteen minutes- ideally, a half an hour. This is the perfect amount of time for you to get some chili garlic sweet potato fries in the oven, as I did (or prep for whatever other side you are going to have with it).
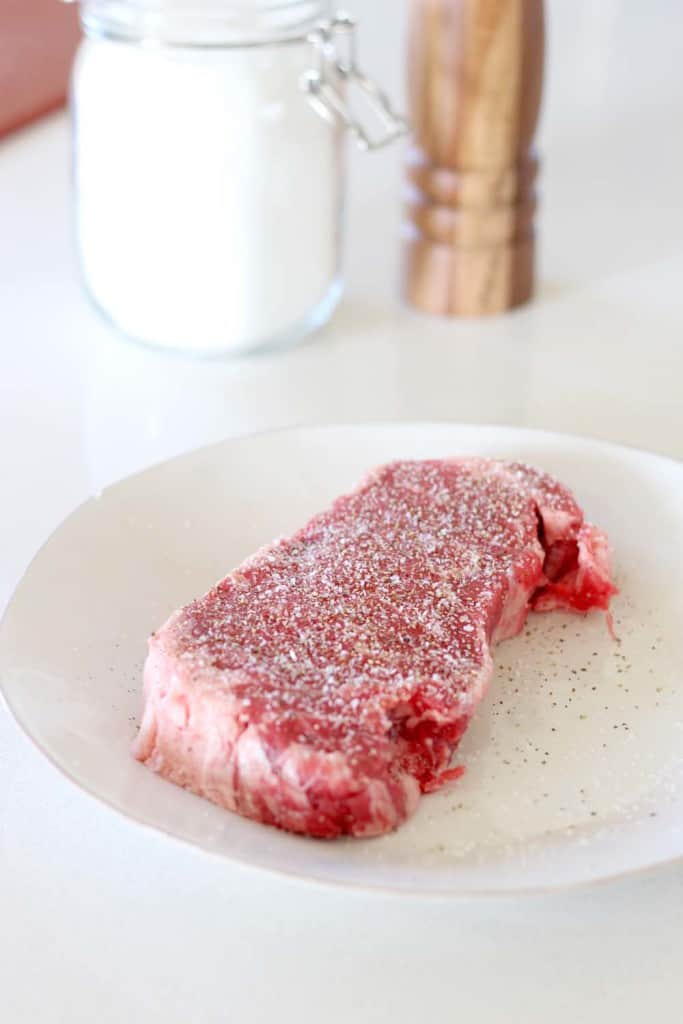
Salt and pepper the heck out of it. First, blot the steak dry with a paper towel. Then, add freshly ground pepper and LOTS of Kosher salt to both sides. Make sure you use Kosher, or coarse sea salt- fine table salt won’t work. For those of you who like measurements: I’d say at least a teaspoon (for a one-pound steak), divided on both sides. For those of you who just “go for it” when it comes to salt: sprinkle an even layer on top that generally covers the whole thing. More is better. Trust me. Here’s why you need lots of seasoning. First: the inside of the meat is not going to be seasoned, so you need to ensure the outside is very salty to properly season an entire bite. And for a one-inch thick steak, this is a lot of meat that doesn’t get seasoned. Second: for this recipe, you will be making an amazing pan sauce out of the juices left in the pan, and some of the seasoning from the steak will be left behind to flavor the sauce.
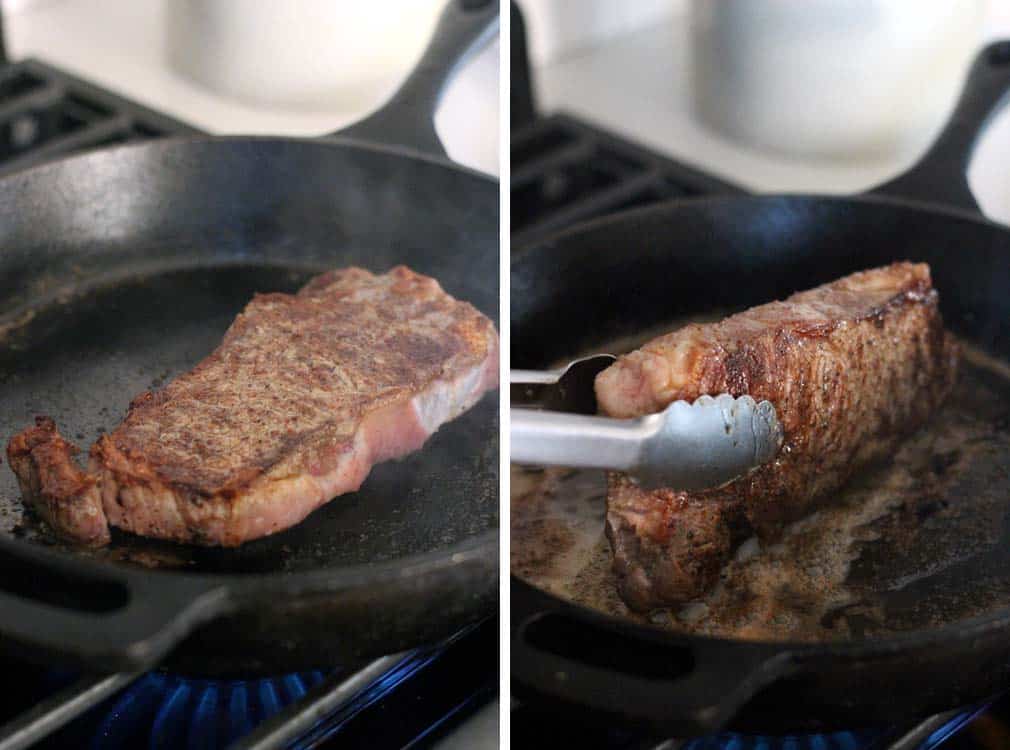
Get the pan searing hot. This is why you want to use cast iron: it gets wicked hot and distributes heat evenly, making it perfect for searing things to perfection. Turn the heat on high and wait for a few minutes, until if you hold your hand a couple of inches above the pan it is very hot and you have to pull away.
Create a perfect crispy seared crust by NOT moving the steak. Once the pan is hot, add butter and wait until it’s melted, and add the seasoned steak. Once it’s in there, don’t move it. This will allow the intense heat of the pan to create an awesome crispy seared crust to the steak. Leave it in there for four minutes, and then flip to the other side and wait another four minutes. At this point a one-inch steak should be a perfect medium-rare. If you prefer a more cooked steak, leave it in for a bit longer to finish cooking. And while you’re at it, sear the edges as well. Keep in mind: when you let it rest after cooking (next step), the internal temperature will continue to rise 5-10 degrees.
Let it rest. Once the steak is cooked to your liking, remove it to a plate and let it rest for at least ten minutes. Similar to making roast chicken, it’s important to let steak rest before cutting into it so the juices have a chance to redistribute. If you cut into it too soon, the juices will escape the meat causing it to be a bit dryer and less flavorful than if you let it rest.
Make a browned butter pan sauce. THIS IS MY FAVORITE PART. And it’s so simple. After you’ve removed the steak from the skillet, you are left with delicious morsels and juices and butter in the bottom of the pan. For the love of God- do NOT let these go to waste. Just add some more butter (about 2 tablespoons) and allow it to melt. Since the pan is so hot, the butter will start to brown rather quickly (browning occurs when the milk solids in the butter get toasted from the heat). Then, add about a half cup of beef broth (chicken or vegetable, or red ow white wine, can be used as well) to the pan. It will sputter and steam and now you’ll deglaze the pan. Use a flat spatula to scrape up and release all the delicious browned bits and leftover seasoning from the steak to incorporate into the sauce. Let it simmer for a few minutes- this allows the flavors to concentrate since some of the liquid will evaporate.
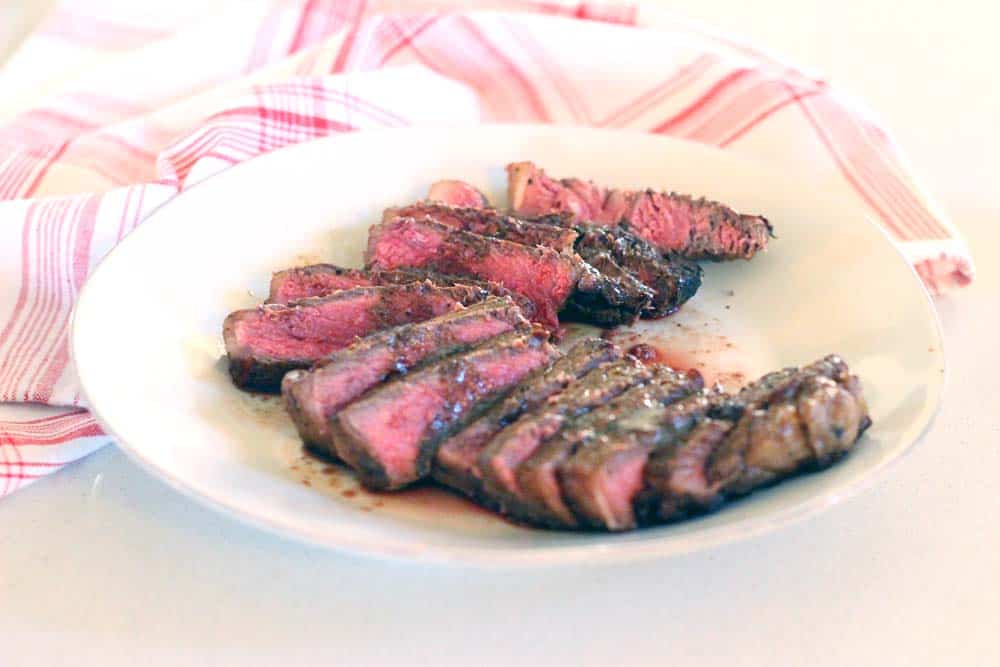
Slice the steak against the grain and drizzle the sauce on top to serve. In other words: the short way, not the long way. I used to serve steak as just one big hunk of meat on a plate, but I recently started slicing it and here’s why. First, it’s easier to eat less when it’s sliced. It fills up more room on the plate, giving the illusion of more food so you eat a bit less. Second, it’s easier to eat because it’s already in smaller pieces. Third, the sauce- that delicious liquid gold you just made- gets drizzled on top of the sliced meat at this point. When it’s sliced, the surface area of the steak increases so more sauce is able to cover more area. More sauce=more happiness. It’s simple math, folks.
Alright, guys! NOW you may go and run to the grocery store to get the ingredients you need for this. And one other quick tip before I go: steak freezes beautifully. So if you see a deal at the store for buying it in bulk, I recommend going for it. Just make sure that when you use the frozen steak it’s defrosted completely before cooking, otherwise it will cook unevenly.
Other easy recipes with pan sauce
Oven-Baked Pork Chops with White Wine Butter Pan sauce Honey Mustard Chicken Crispy Honey Buffalo Chicken Thighs Pan-Fried Sea Bass with Lemon Garlic Herb Sauce
Printable recipe below. Enjoy!