This post contains helpful tips and tricks! If you’re in a rush, please use the “Jump to Recipe” above!
💭 Why you’ll love this authentic kitchari recipe
Authentic, Ayurvedic recipe: This kitchari recipe was passed down from my grandmother. I only use ingredients that follow Ayurvedic principles. I do not use additives like garlic (which remove some of the Ayurvedic properties). To read more about this, scroll down to the ingredients and notes section. Versatile, great for meal-prep: I’ve always had kitchari for breakfast, but it can easily make a great lunch, or dinner. It’s also versatile in the types of veggies you can add! Naturally vegan and minimal ingredients: Though kitchari is served with a dollop of ghee, the recipe is vegan as written. You are welcome to add ghee if you wish! Detox / digestion friendly: The softness of this dish makes it easy for digestion, and can work as a “detox” since it is also highly nutritious (in both proteins and other nutrients!)
Notes and substitutions
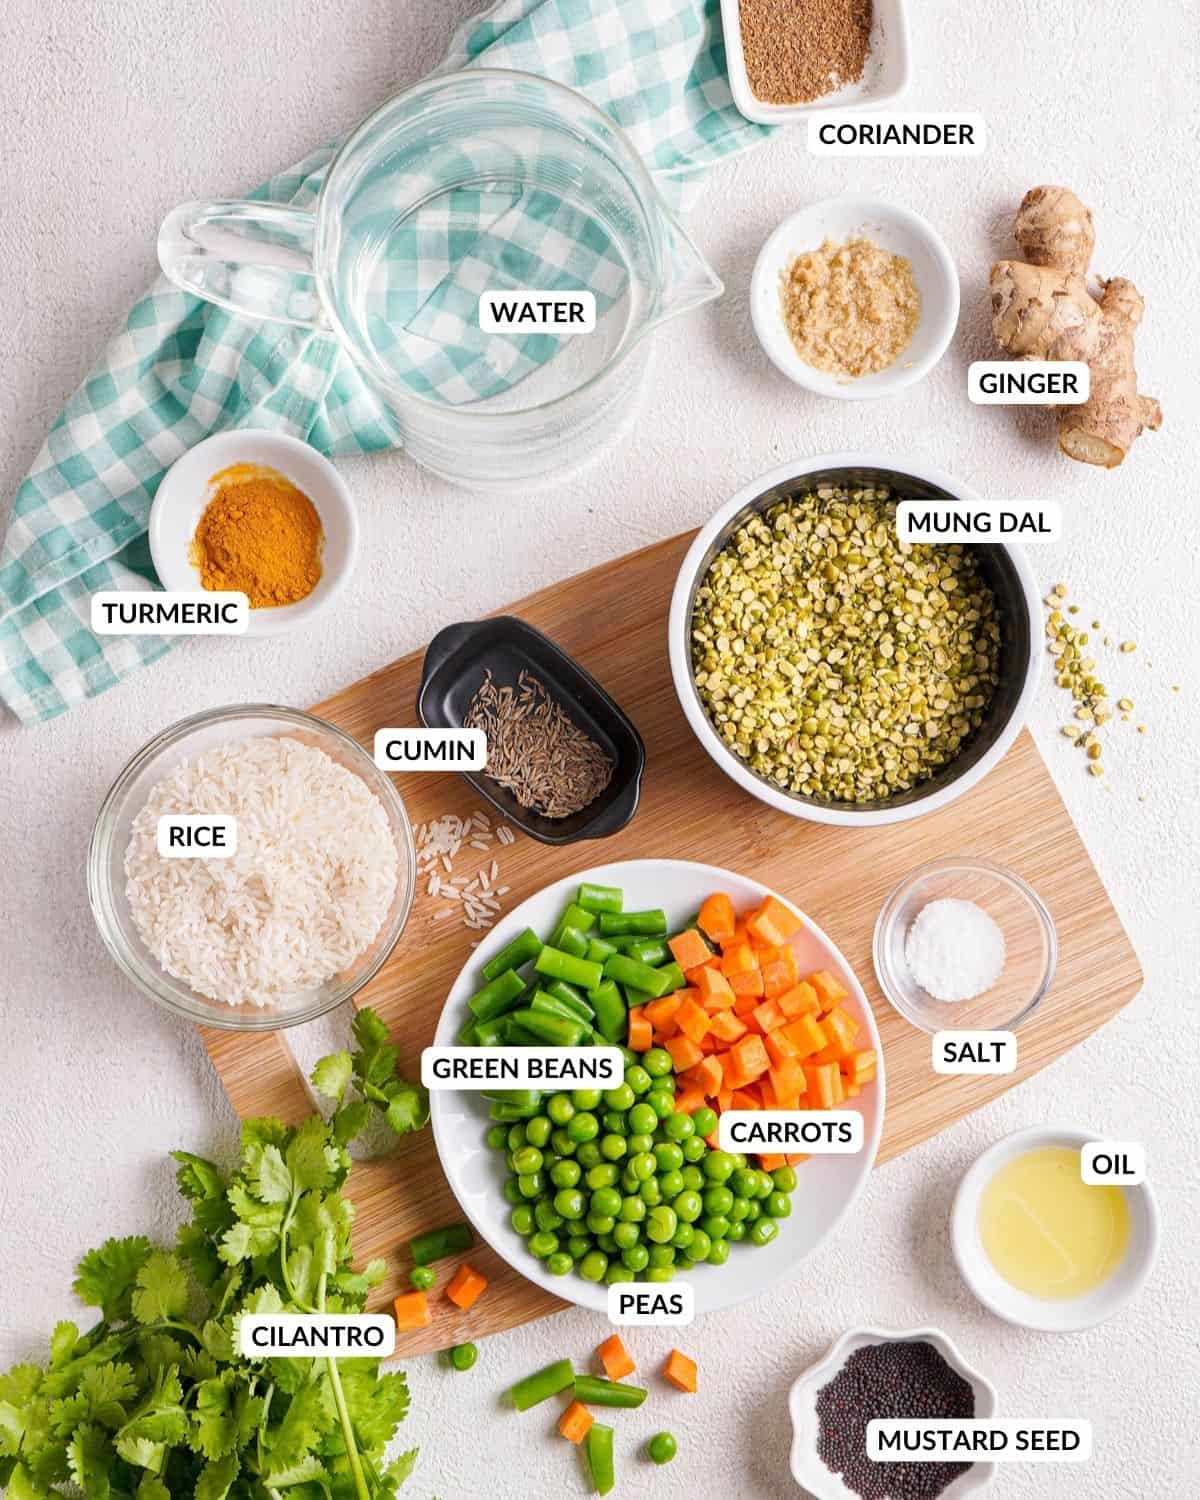
Moong dal is the small yellow lentil found inside the green mung bean (also called split mung beans). Since one of the primary benefits is digestion, the lentils are preferred over beans. In a pinch, you can substitute this with red lentils found in your grocery store. Basmati rice is used in this recipe since it’s most commonly available, but you can substitute this with quinoa, amaranth, brown rice, red rice, or spelt (and maintain tridoshic properties) Homemade kitchari spice mix consists of fresh ginger, turmeric, cumin seeds, coriander and mustard seeds. We use both ground and whole spices to enhance flavor and for detoxifying and anti-inflammatory properties. You can also add warming spices like asafetida, fennel seeds, and fenugreek for more flavor. Vegetable medley is highly customizable - I typically use a mix of seasonal vegetables and almost always have carrots and peas. You can use fresh or frozen veggies. I omit onions and garlic in this recipe so it can be tri-doshic, but you can add these in if you’re not following the principles strictly.
📖 How to make kitchari
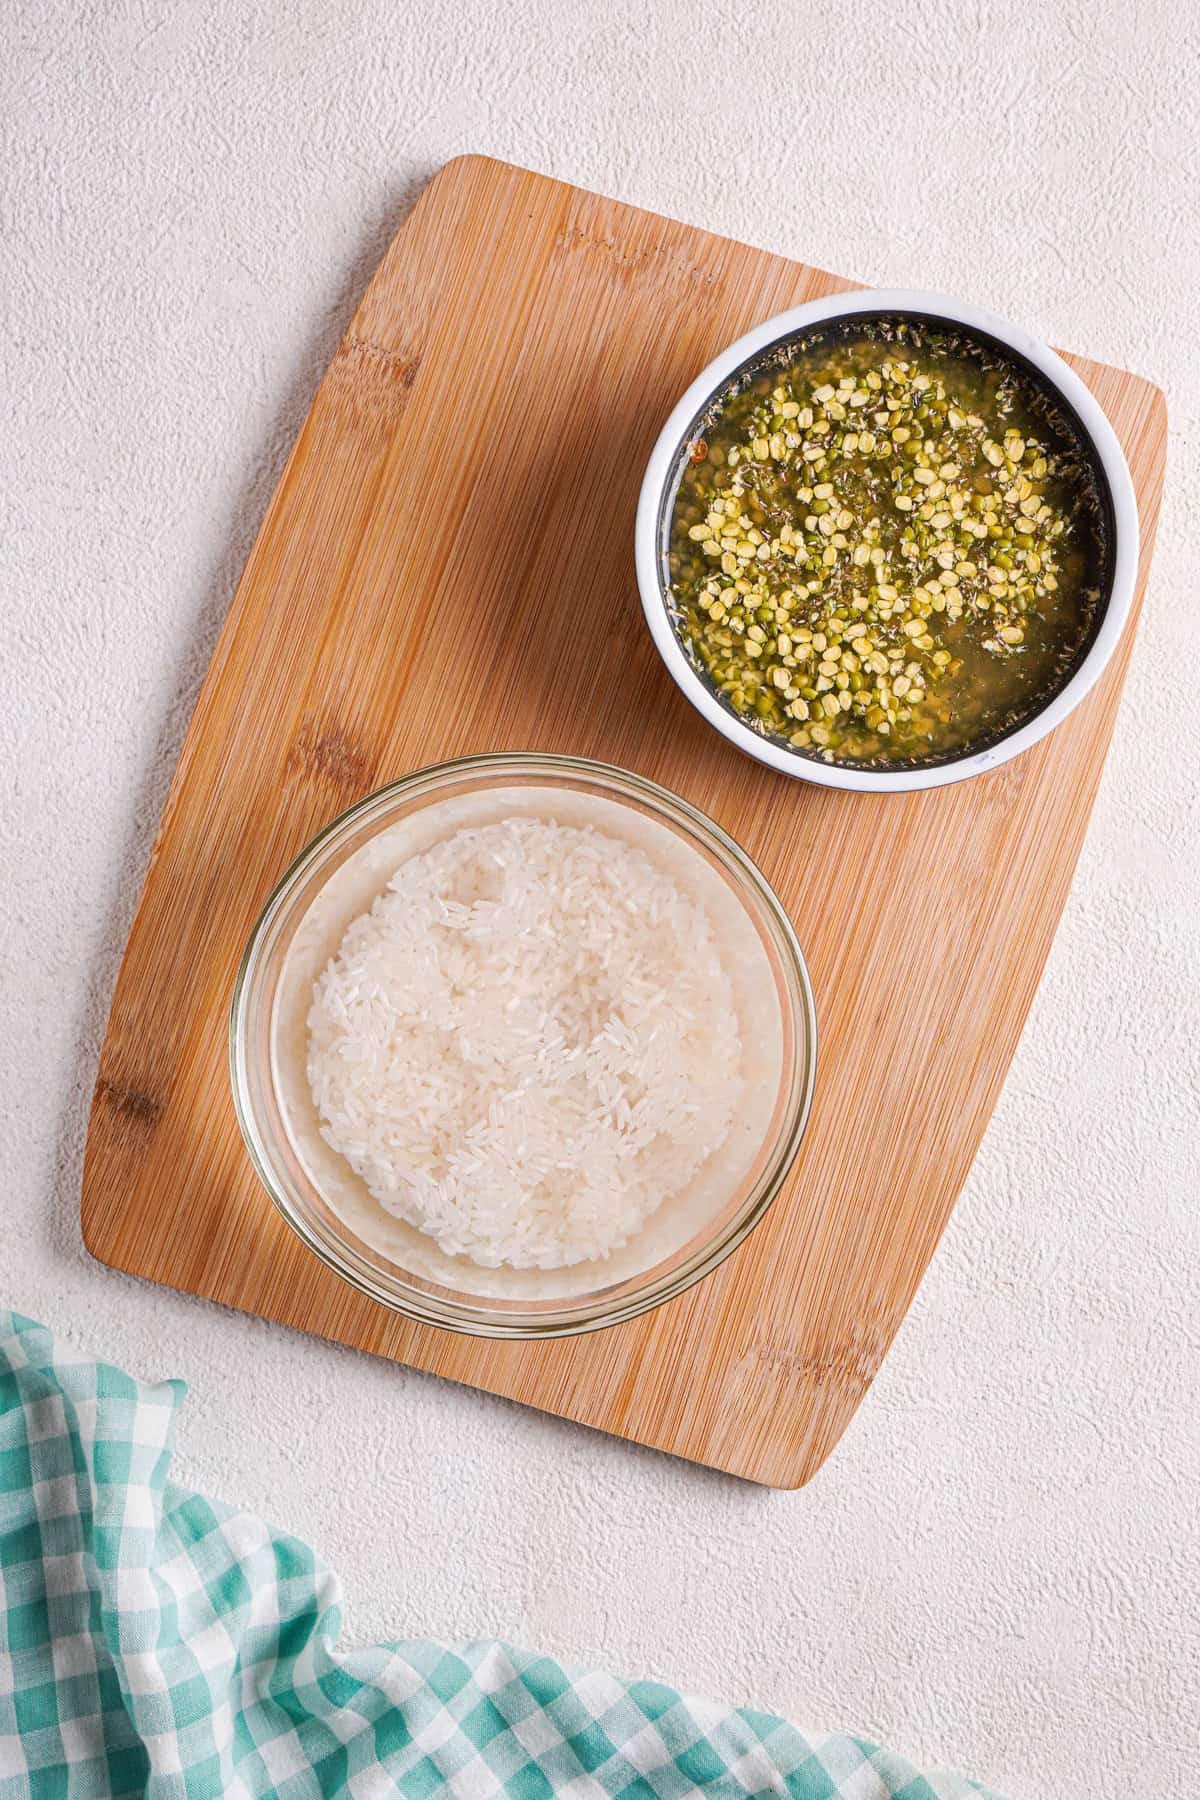
Wash the rice and lentils
Sift through the rice and lentils with your hands to see if there are any minor impurities in there, then wash both rice and my mung dal separately at least 2-3 times. This is done to remove the excess starch in the rice and clean the lentils. Kitchari is also called khichdi, bisibelabath, sukhpawani, pongal in different parts of India and has its origins in Sanskrit (khiccā, meaning ‘a dish made with rice and pulses’) The combination of rice, lentils and spices aids digestion, and nourishes your body with all the essential nutrients. It is considered tri-doshic. So, this is one of the most common staple dishes in many homes across India! This is especially important if you’re using a polished rice like basmati (which is not the typical variant used in India). Wash until the water runs mostly clear.
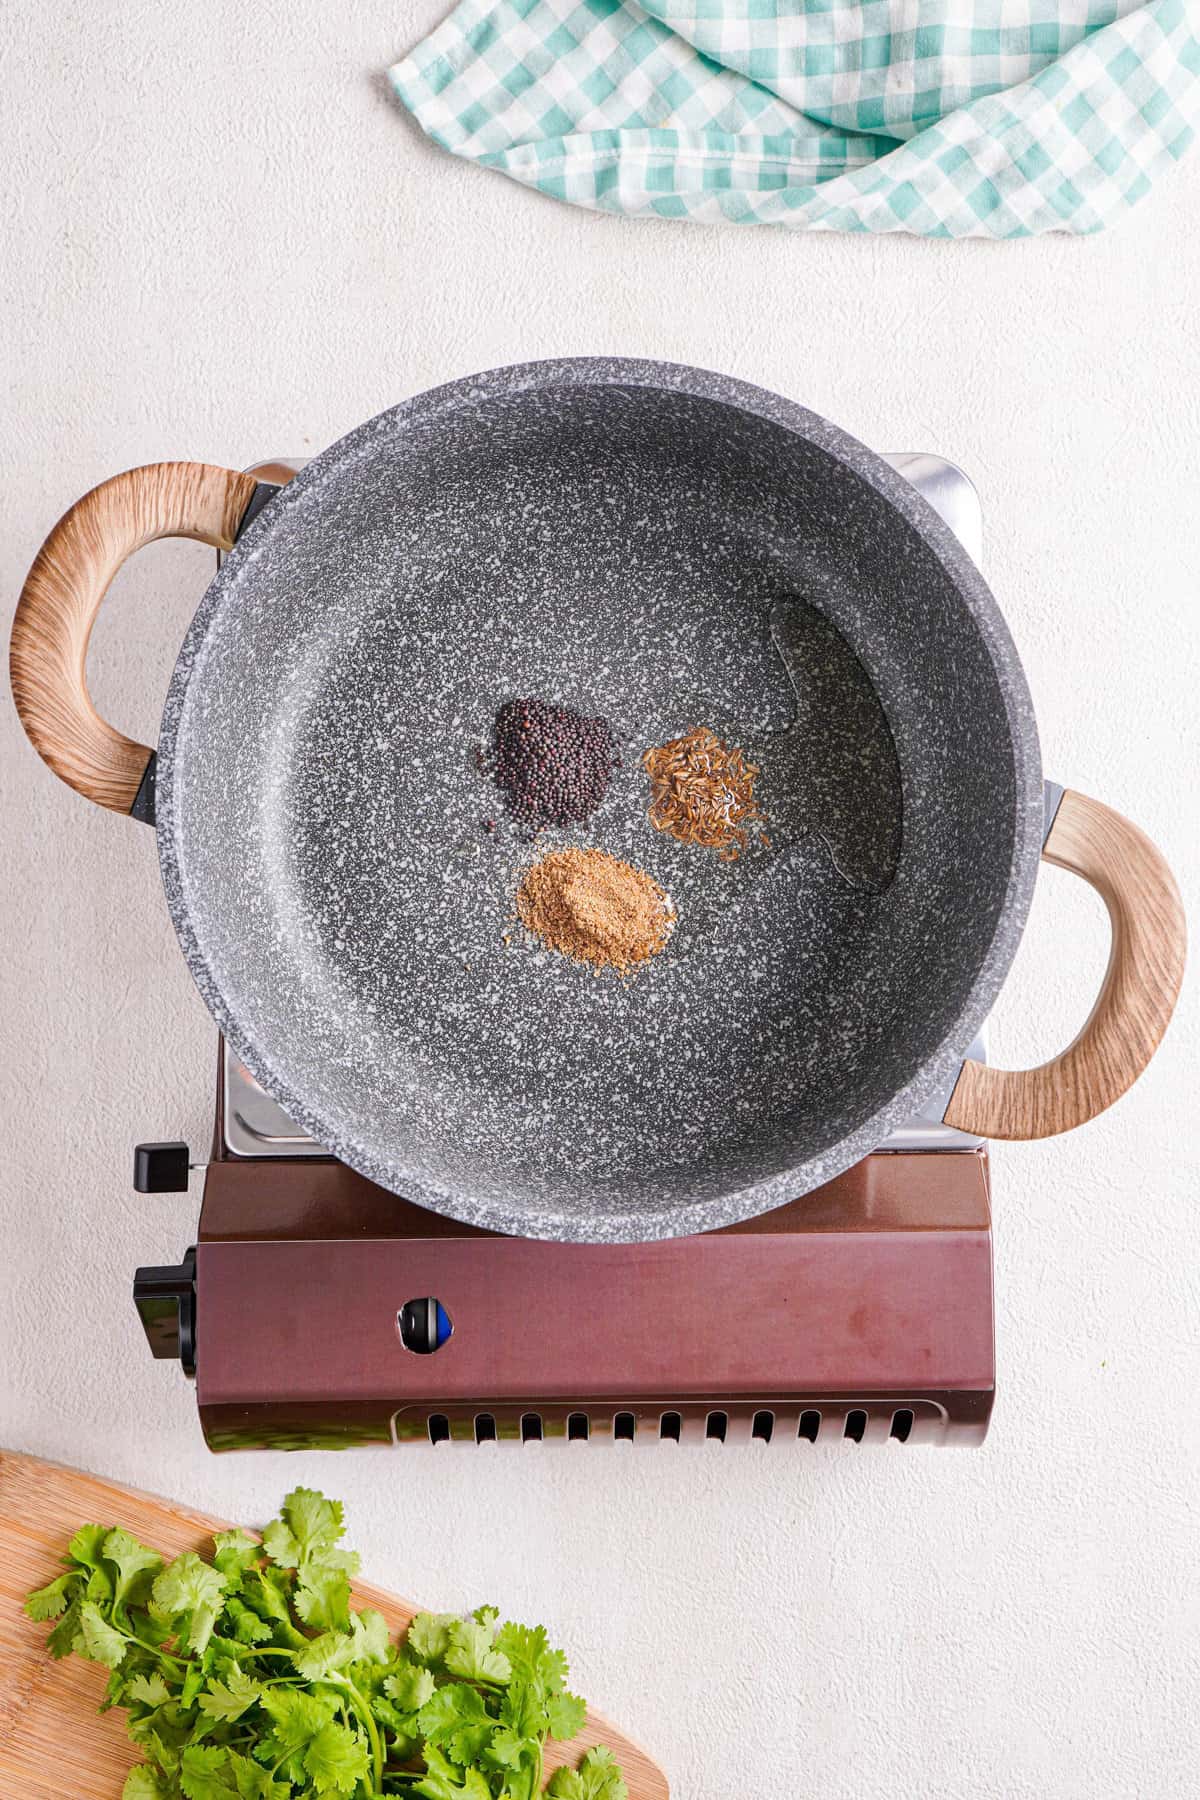
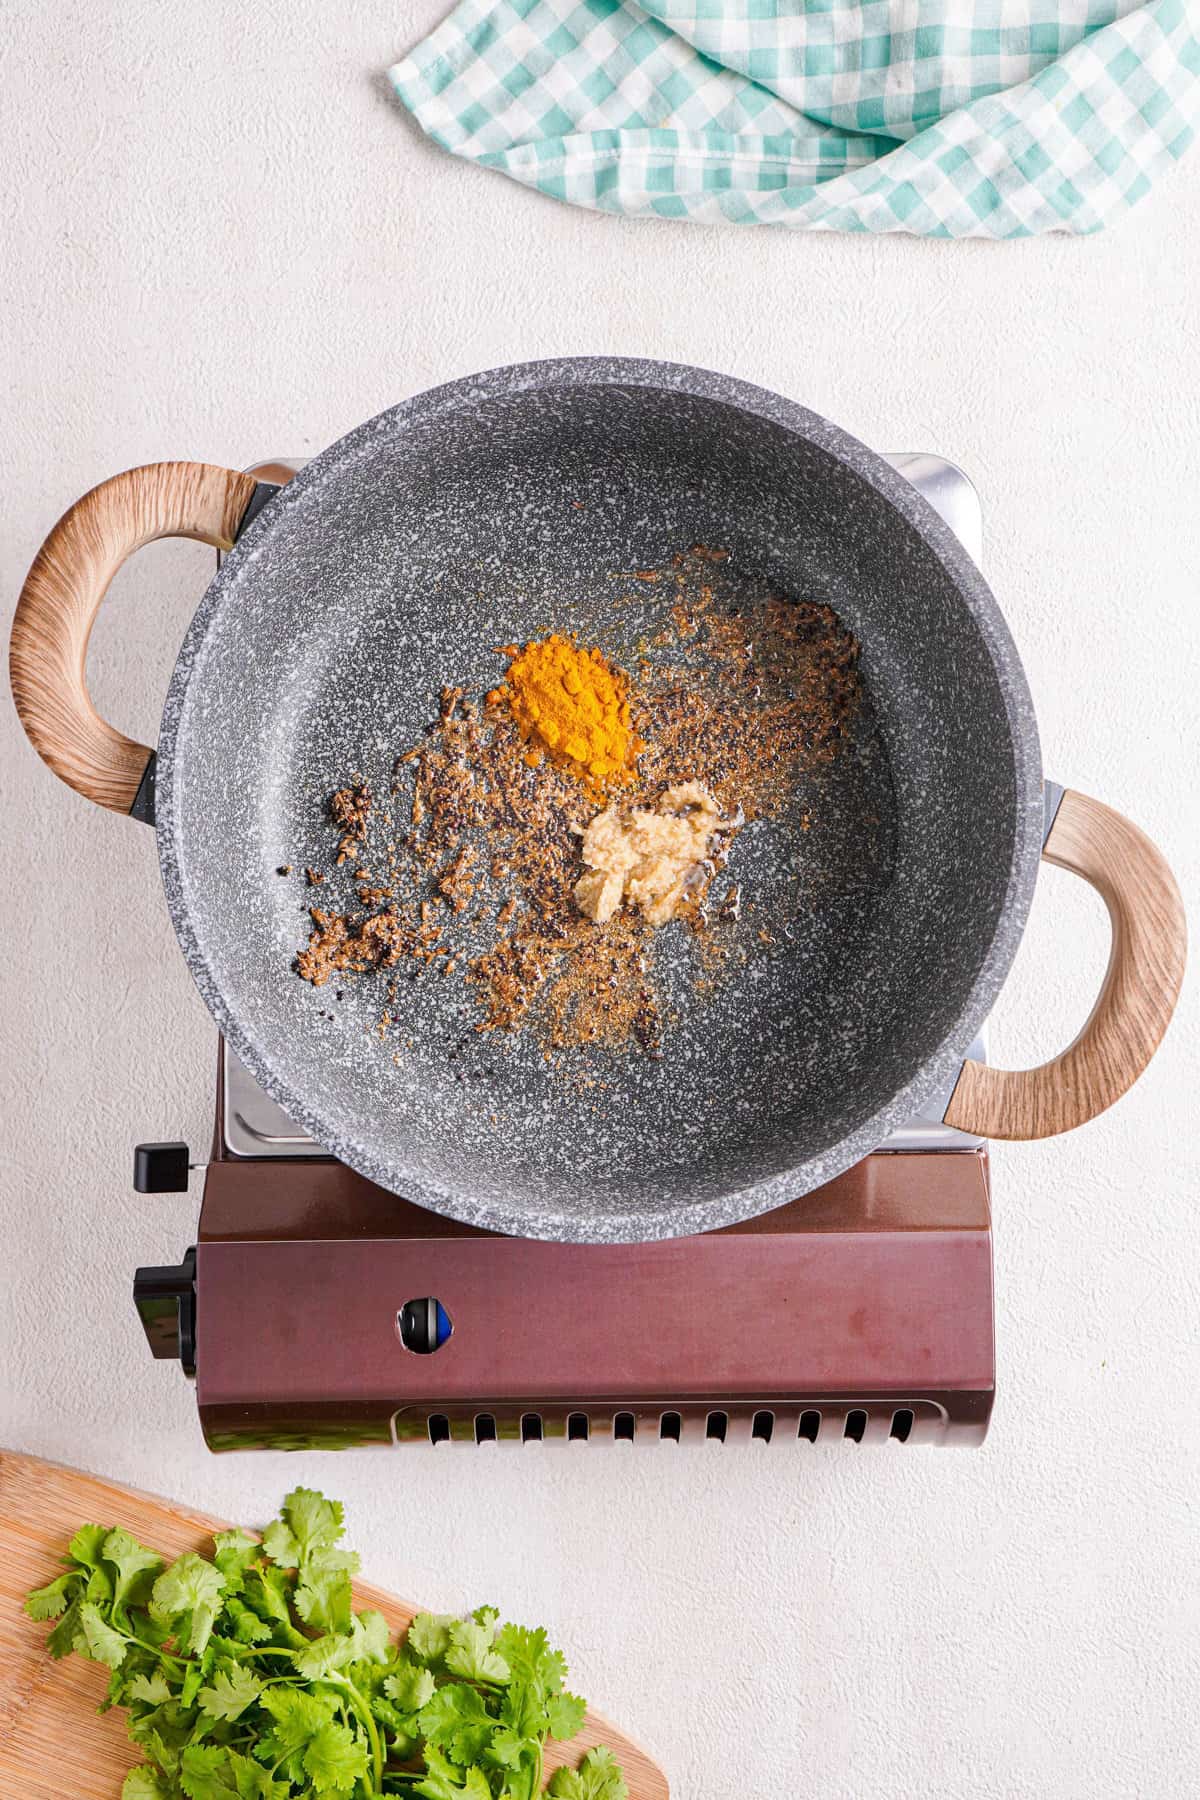
Toast the spices to release their flavors
Heat vegetable or coconut oil (or fat of choice) in a large skillet or pot (with a lid) over medium heat. Then, add the mustard seeds, cumin seeds, and ground coriander to the oil and stirring occasionally, until fragrant, about a minute. Finally, add minced ginger and turmeric and cook for about 15-20 seconds.
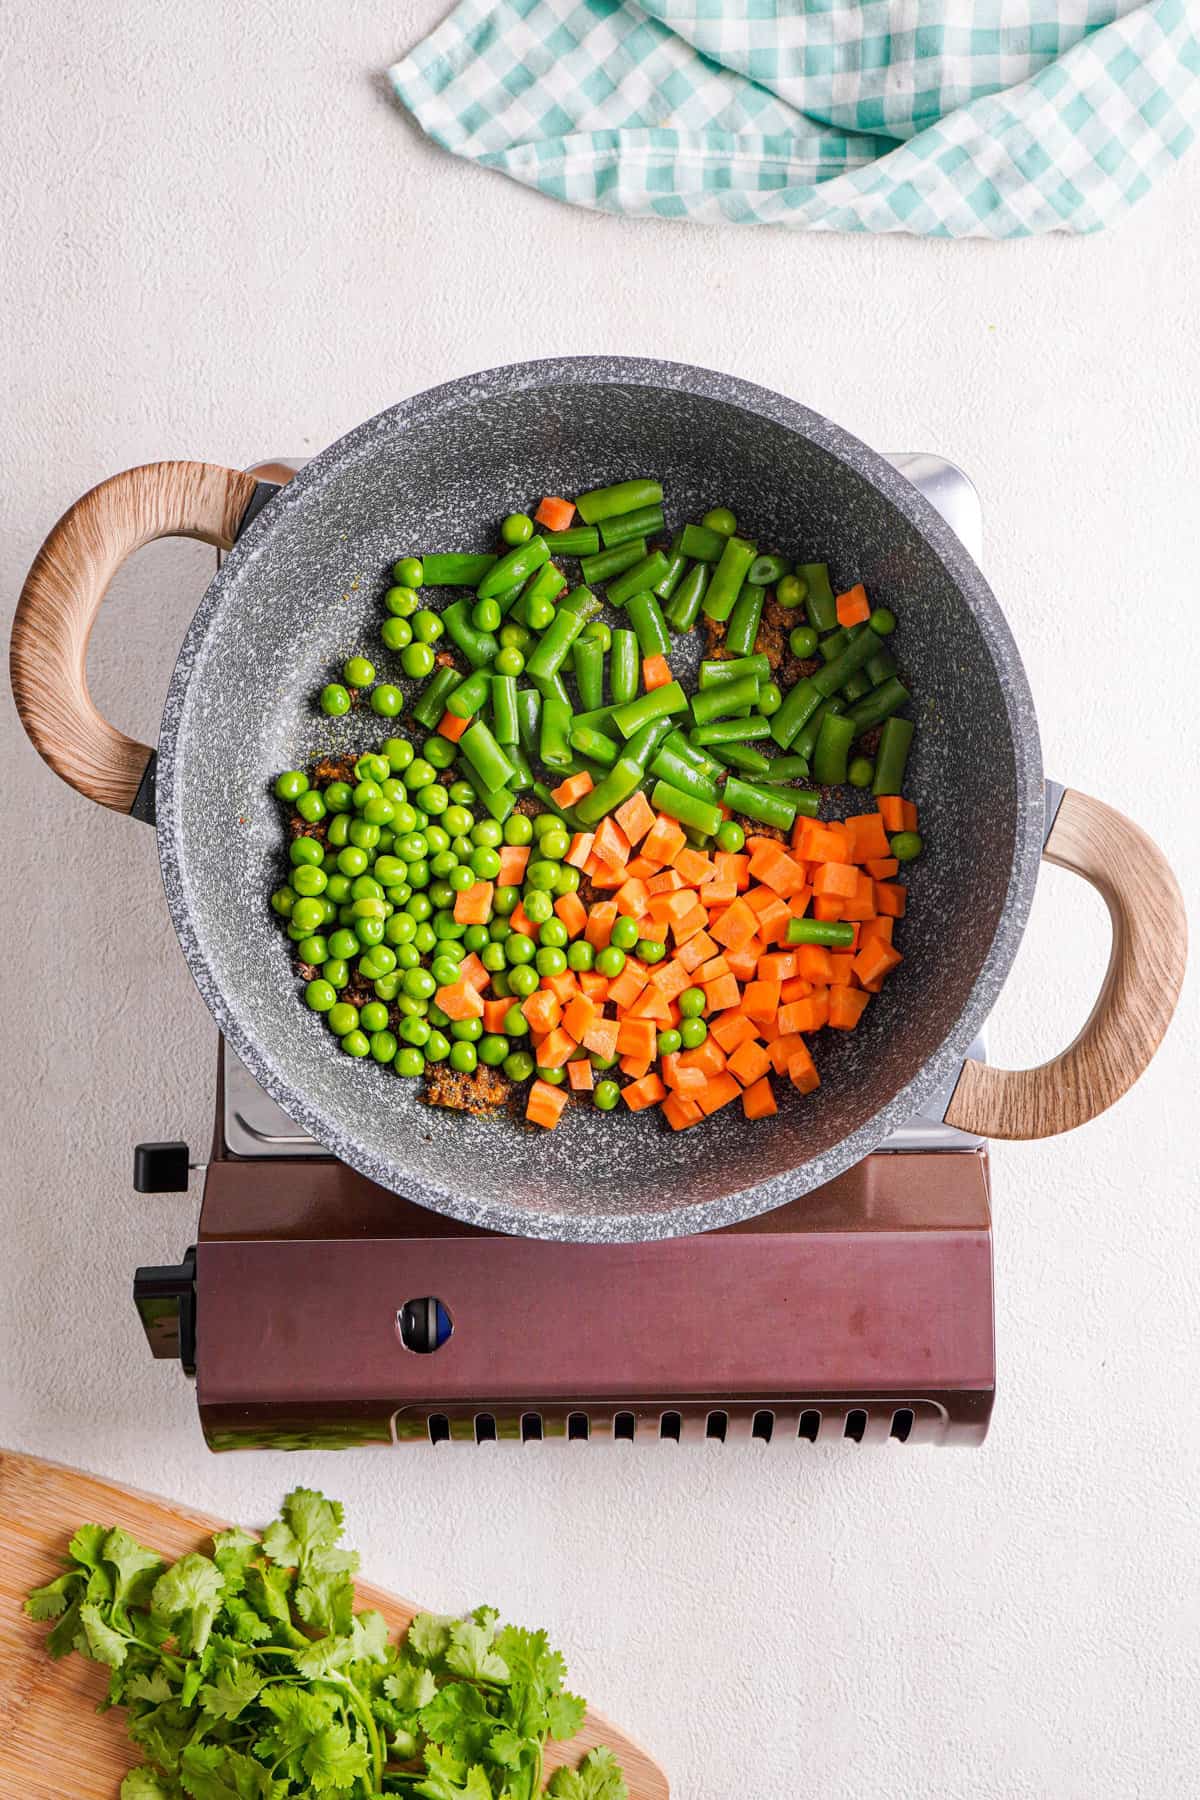
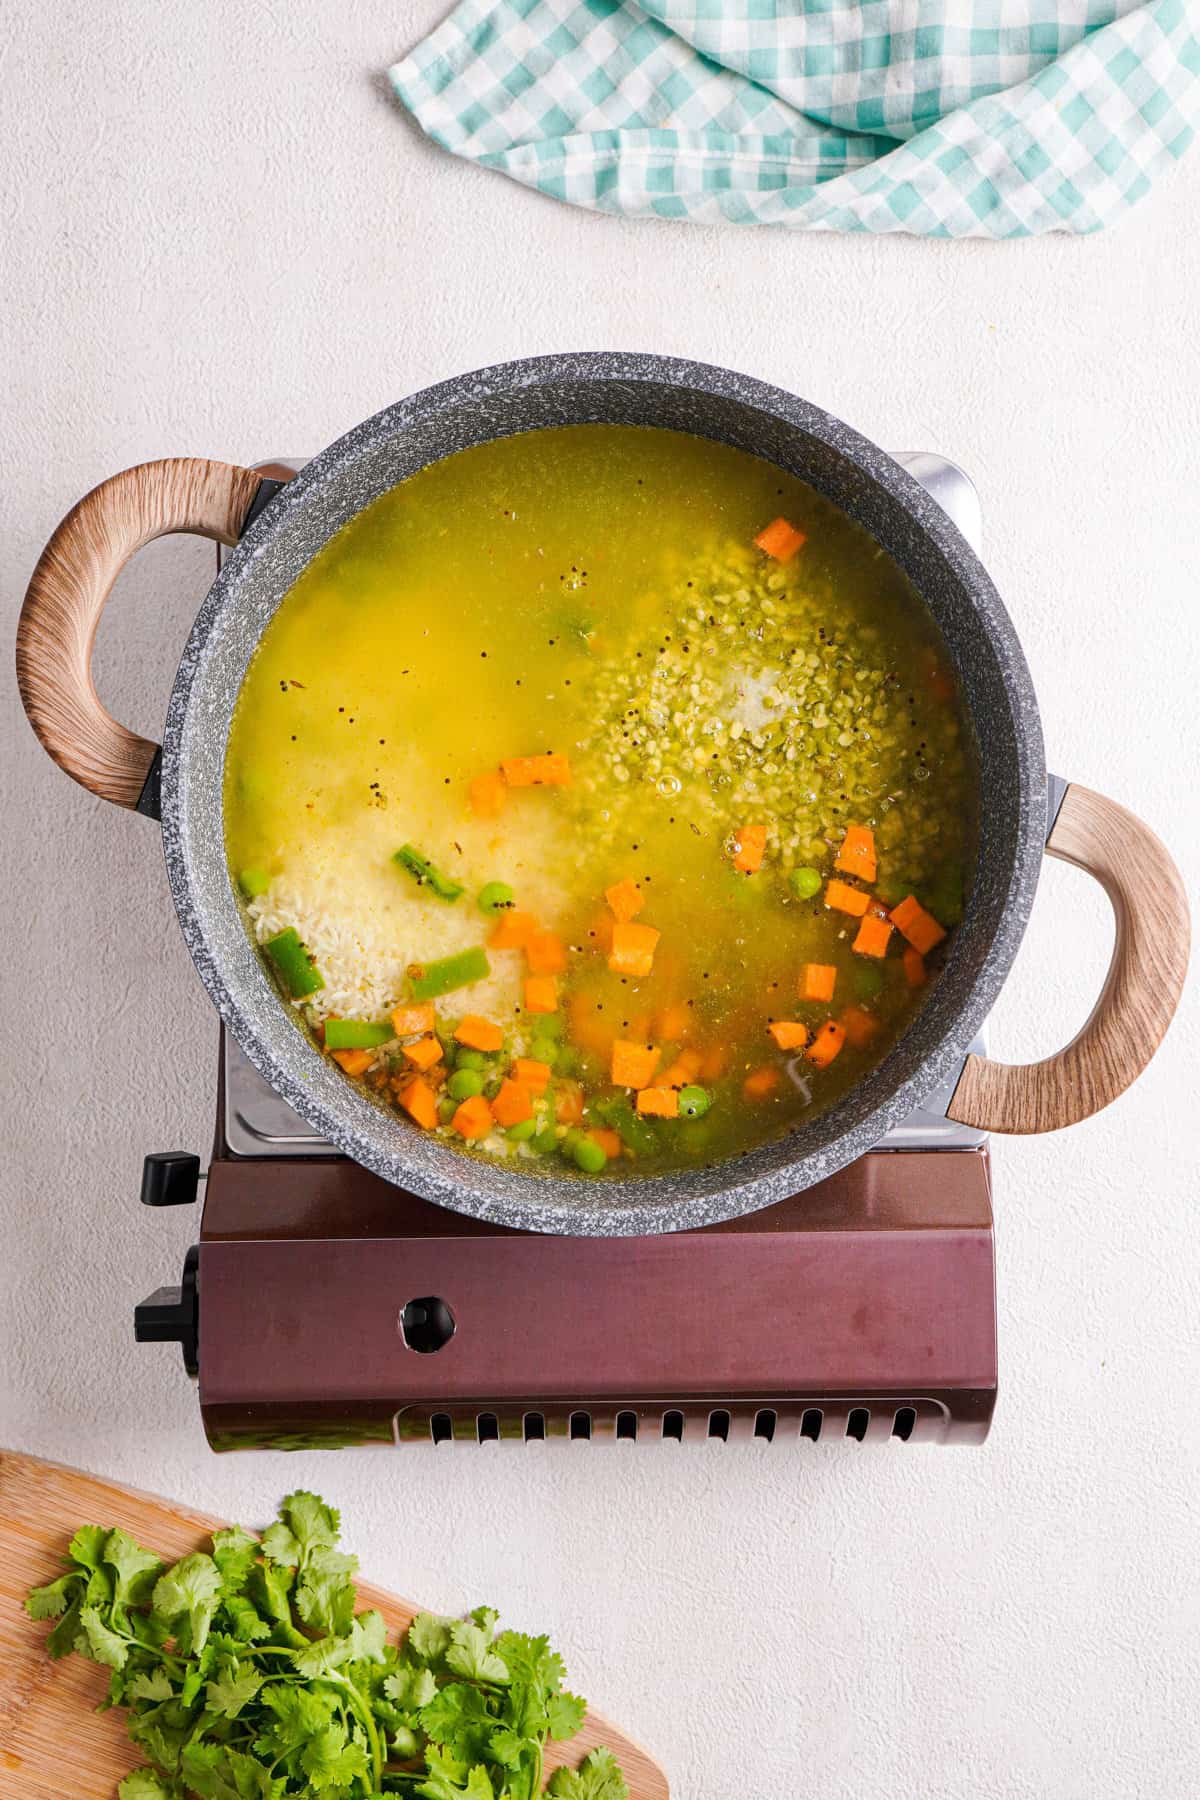
Cook rice, lentils and vegetables with water
Add the the vegetables and sauté quickly. Then, add the rice and vegetables along with water and a pinch of salt. Bring all of this to a boil.
Then, reduce the heat and cook covered, on low heat, for about 30 minutes.
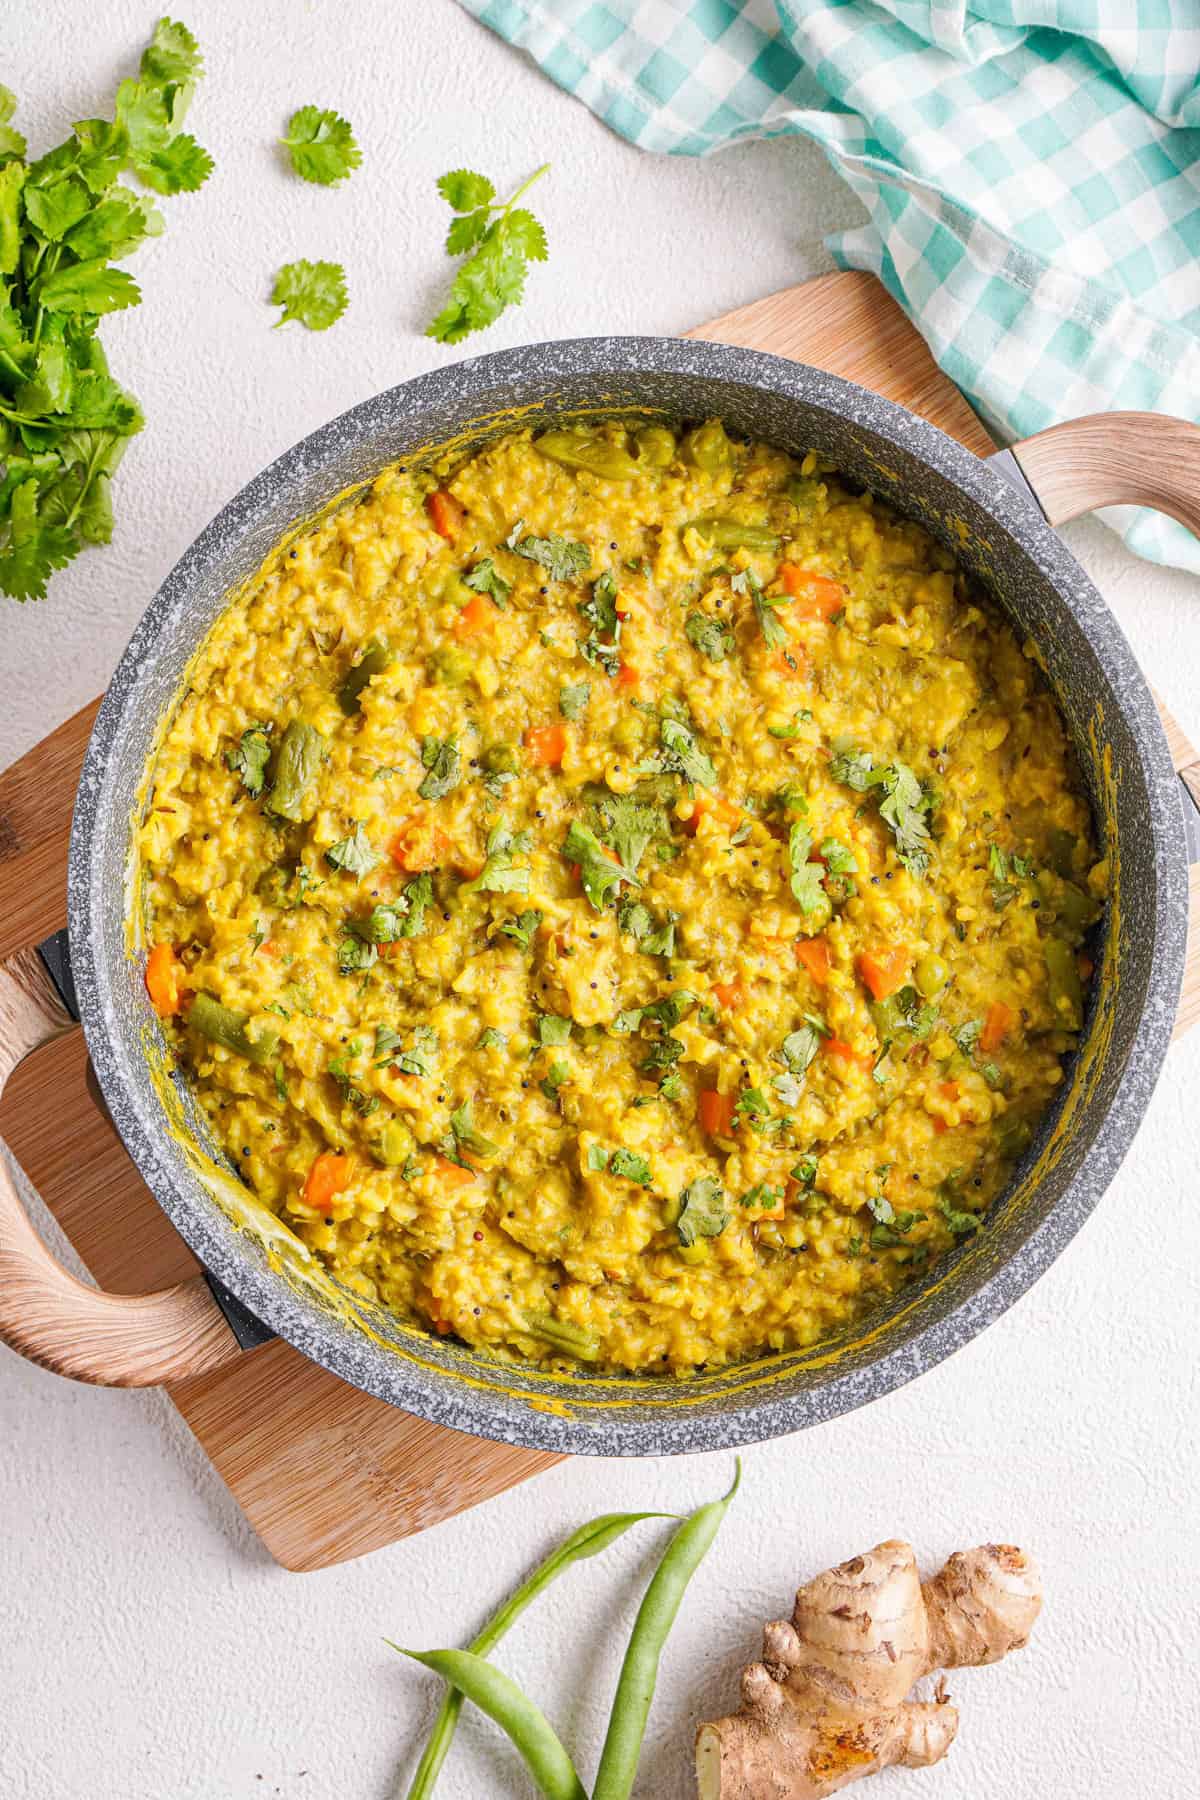
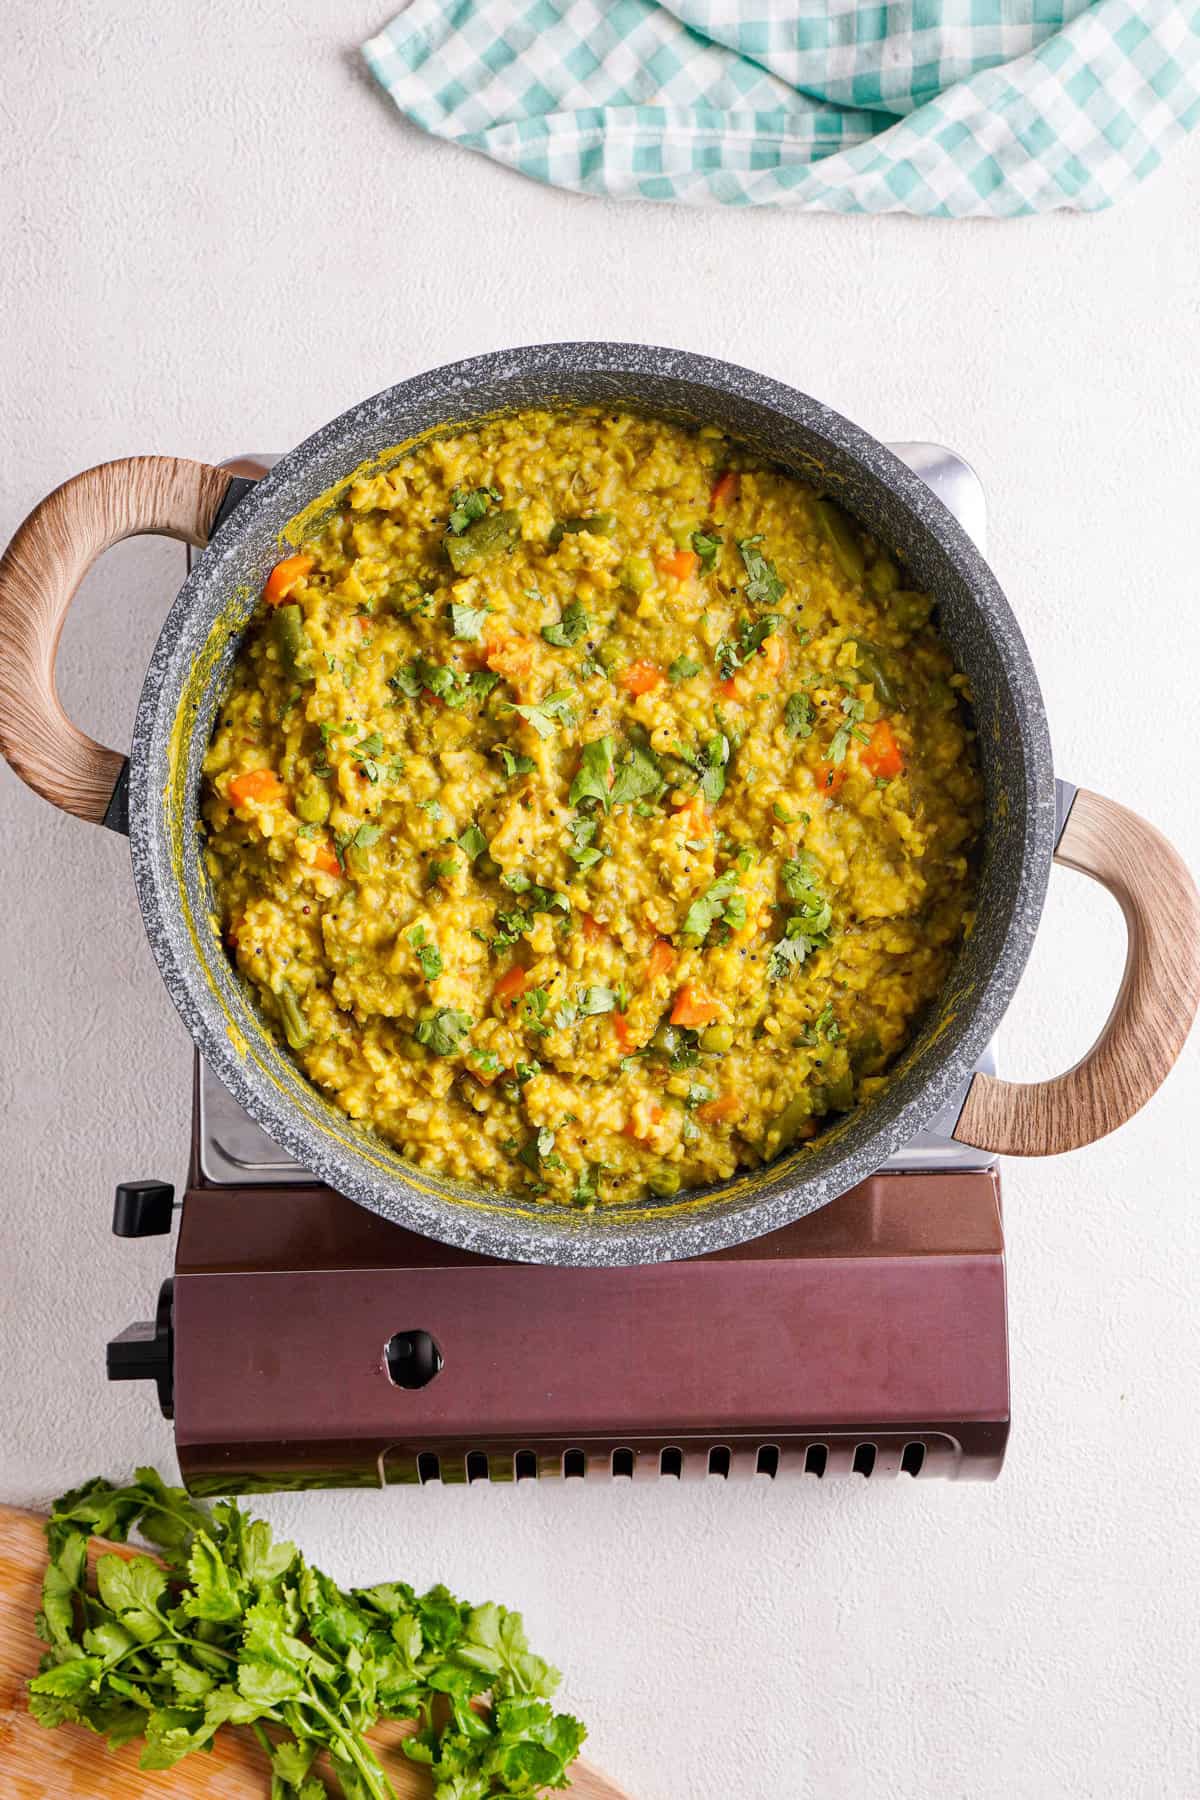
Note that this yields a kitchari that has somewhere between a risotto and porridge-like consistency. If you want it more discrete, I suggest reducing the water by half a cup.
Check at the 30 minute mark to see if the rice and lentils are cooked through and the dish has a porridge like consistency.
If it’s done, you can remove the dish from heat. If not, continue to cook and check in 5 minute increments until cooked.
Adjust salt to your taste (if needed), and garnish with fresh cilantro. Serve hot!
📖 Instant Pot Kitchari Recipe
It is very easy to make this recipe in an Instant Pot or pressure cooker. In fact, Instant Pot or pressure cooker kitchari makes the process all the more easier!
Substitute mung dal with urad dal - according to the Monash University’s FODMAP app, chana and urad dals (as well as canned lentils) are considered low FODMAP. If you are trying to add more flavor by using vegetable broth, please be aware that many vegetarian or vegan broths contain garlic and onion. So, to keep this truly Ayurvedic and low FODMAP, I suggest using only water. Alternatively, you can use a low FODMAP soup base (which is not Ayurvedic). Premade kitchari spices, though convenient, often contain asafetida (hing) instead of onion or garlic. But most asafetida has gluten in it. If you want to use hing and follow either Ayurvedic or low FODMAP protocols, I suggest picking up a brand like this one (which is gluten free).
Start by washing the rice and mung dal until the water runs clear (just like the stovetop version). Then, set your Instant Pot to the sauté setting. Add oil of choice followed by mustard seeds, cumin seeds and ground coriander. Stir a bit to release the natural flavors of the spices (about a minute). Then, add the minced ginger and turmeric and stir to combine. Next, add washed rice, mung dal, along with a cup of vegetables of your choice as well as 3.5 to 4 cups of water. Close the lid and pressure cook on high pressure for roughly 8 minutes for a well cooked porridge-like consistency. Then, quick release pressure after 5 minutes. Garnish with fresh cilantro and serve hot!
Note: if you’re using an Instant Pot to make kitchari, it will be more porridge-like. Do not reduce the water in this instance, since Instant Pot uses steam and pressure cooking and reducing the water might burn the bottom of your food!
👩🏽🍳 The Kitchari Cleanse
Though kitchari has its stronghold in ancient Indian tradition, it has been made wildly popular these days due to the Kitchari Cleanse. I’m not a fan of fad diets and cleanses generally, but the kitchari cleanse is basically what we did at home anytime we got sick (except, of course, we didn’t call it that). Modern kitchari cleanses start with a week where you cut back on sugar, coffee, alcohol and other processed foods to prepare for the cleanse. Then, for about a week, you typically consume something high in fiber for breakfast and kitchari for both lunch and dinner as well as 8 to 10 servings of water to stay hydrated. When I’ve done this in the past, I’ve slowly weaned off kitchari over the next few days. Pretty straightforward! If you’re interested in learning more about the Ayurvedic philosophy associated with this cleanse, and find out more about doshas, take a quiz online!
🍴 Serving and storage suggestions
Storing Kitchari: This dish is so, so easy to make a large batch for convenience. From a food safety standpoint, you can store kitchari in the fridge for up to 4 days, in an airtight container (make sure to cool it to room temperature first). Then, when you’re ready to eat, just pop it in the microwave for a few. Freezing Kitchari: If you need to store it longer-term, allow kitchari to cool to room temperature, throw it in a freezer bag or airtight container. I suggest portioning them into individual sizes, and make sure to leave an inch of space on top since the liquids in the dish will likely expand. You can freeze it for up to 3 months! Reheating Kitchari: When you’re ready to eat it, I recommend thawing it first (either move it to the fridge the night before, or let it sit on a counter for at least an hour). Then, just go ahead and heat it up in a pot or warm in a microwave with a damp paper towel on top. Good to go! From an Ayurvedic standpoint, leftovers are best eaten within 24 hours, since you’re unlikely to feel energetic, clear and balanced after a longer time. Check out my other healthy but comforting vegan lentil recipes:
Simple Indian Dal TadkaStir Fry Green Beans with Coconut Quick Jeera Rice (Indian Cumin Rice)Misir Wot
📖 Recipe
Note: This recipe was originally published on February 8, 2021. It was updated on March 11, 2024 with additional tips and tricks.