This post contains helpful tips and tricks! If you’re in a rush, please use the “Jump to Recipe” above! Jump to:💭 Why you’ll love this recipe📋 Ingredients and Notes🥘 How to make kimchi mac and cheese👩🏽🍳 Top tips for the best kimchi mac and cheese! 🍴 Serving and storage suggestions📖 Recipe💬 Comments
💭 Why you’ll love this recipe
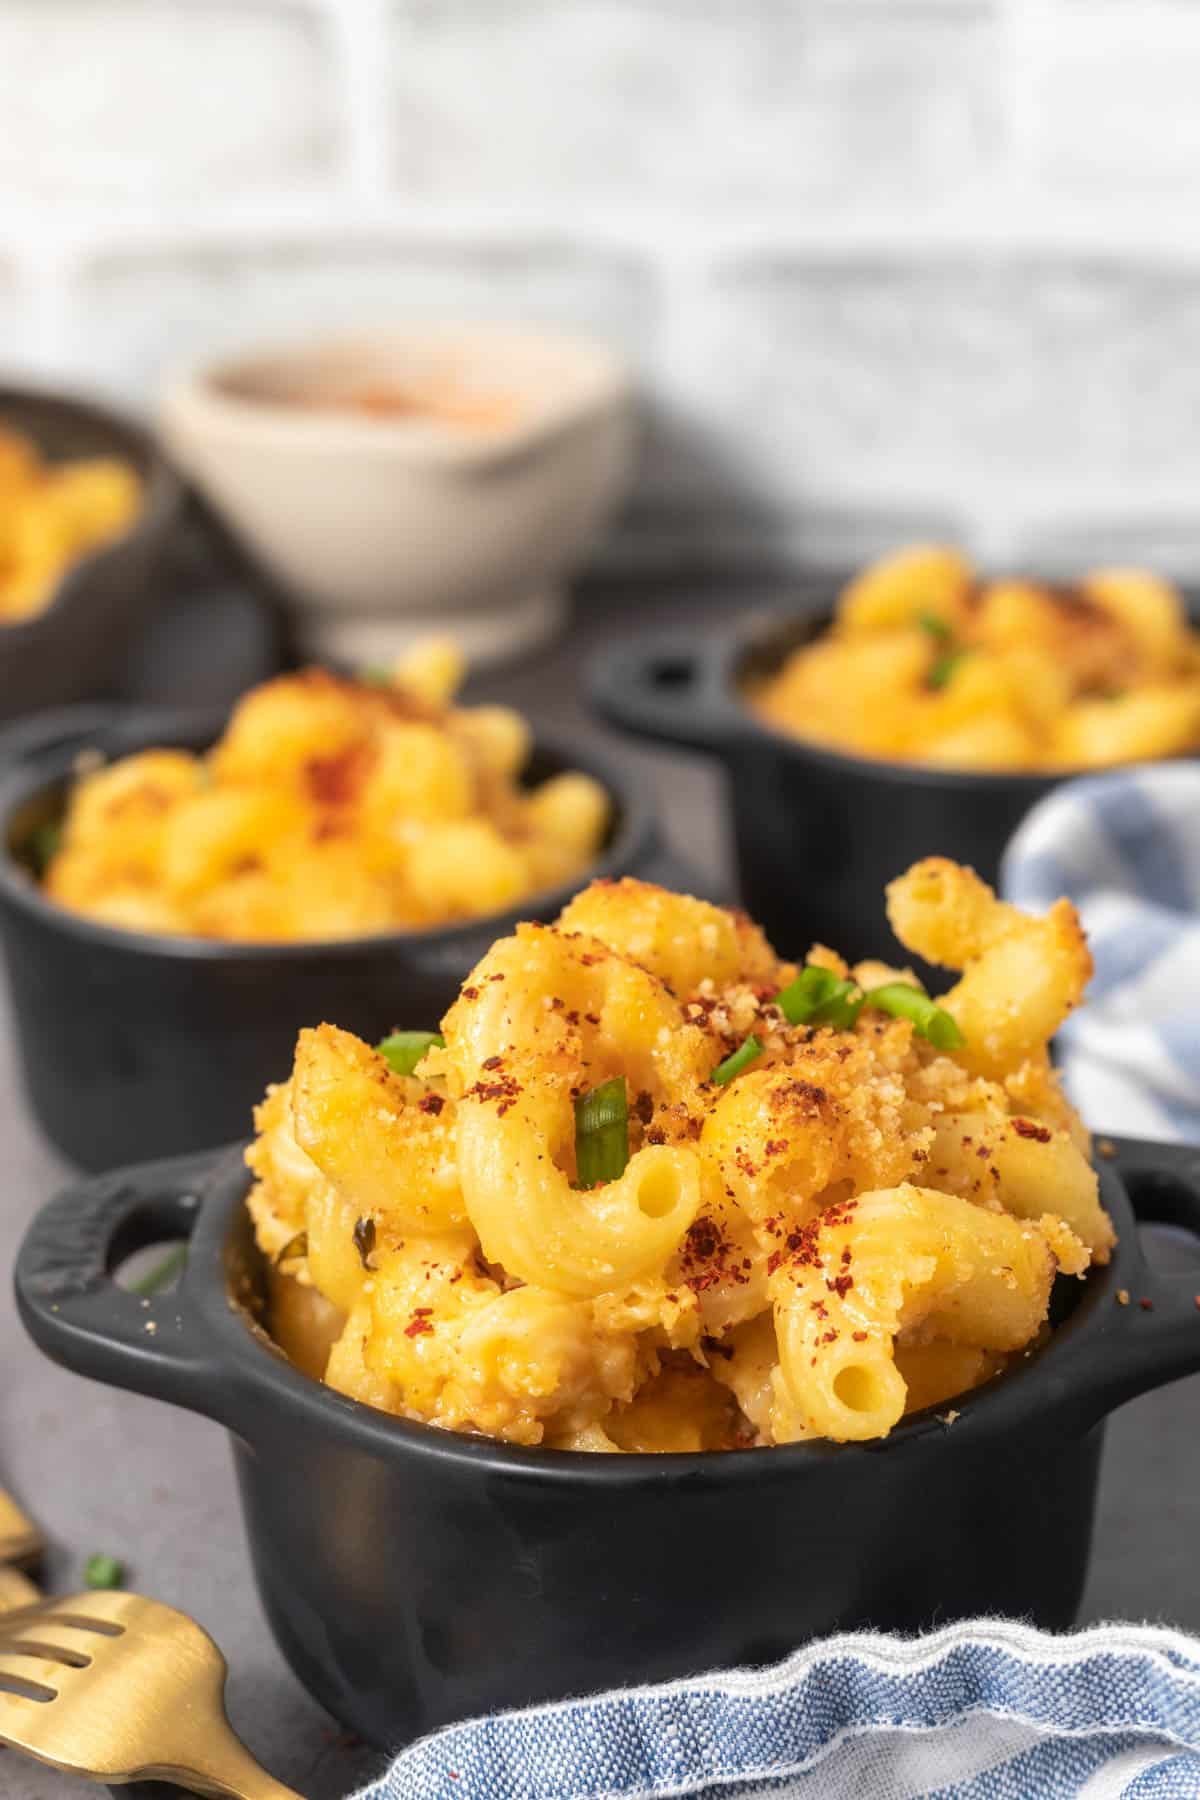
If you’re looking for a creative and flavorful way to make mac and cheese, you’ll love my kimchi mac and cheese recipe. It combines the classic comfort of mac and cheese with the unique flavor of kimchi, which adds a slight kick of spice.
Not your boring mac and cheese: Don’t get me wrong, I love traditional mac and cheese, but sometimes you just want something with a bit more oomph! This kimchi mac and cheese recipe hits that mark (or if you want something a bit more decadent, try my baked gouda mac and cheese!) More nutritious: Kimchi has many known health benefits. Though heating kimchi denatures the bacteria for probiotic benefits, it still has other nutrients (e.g., beta-carotene and other antioxidant compounds) so it’s more nutritious than regular mac!Simple, and ready in under an hour: Though this recipe has complex flavors, it’s really easy to get right and can be made in just 55 minutes - makes for a perfect side dish! Can be adjusted to spice tolerance. The kimchi adds just a slight kick of spice to liven up your meal, so whether you’re a fan of spicy foods or not, you’ll love this kimchi mac and cheese!
📋 Ingredients and Notes
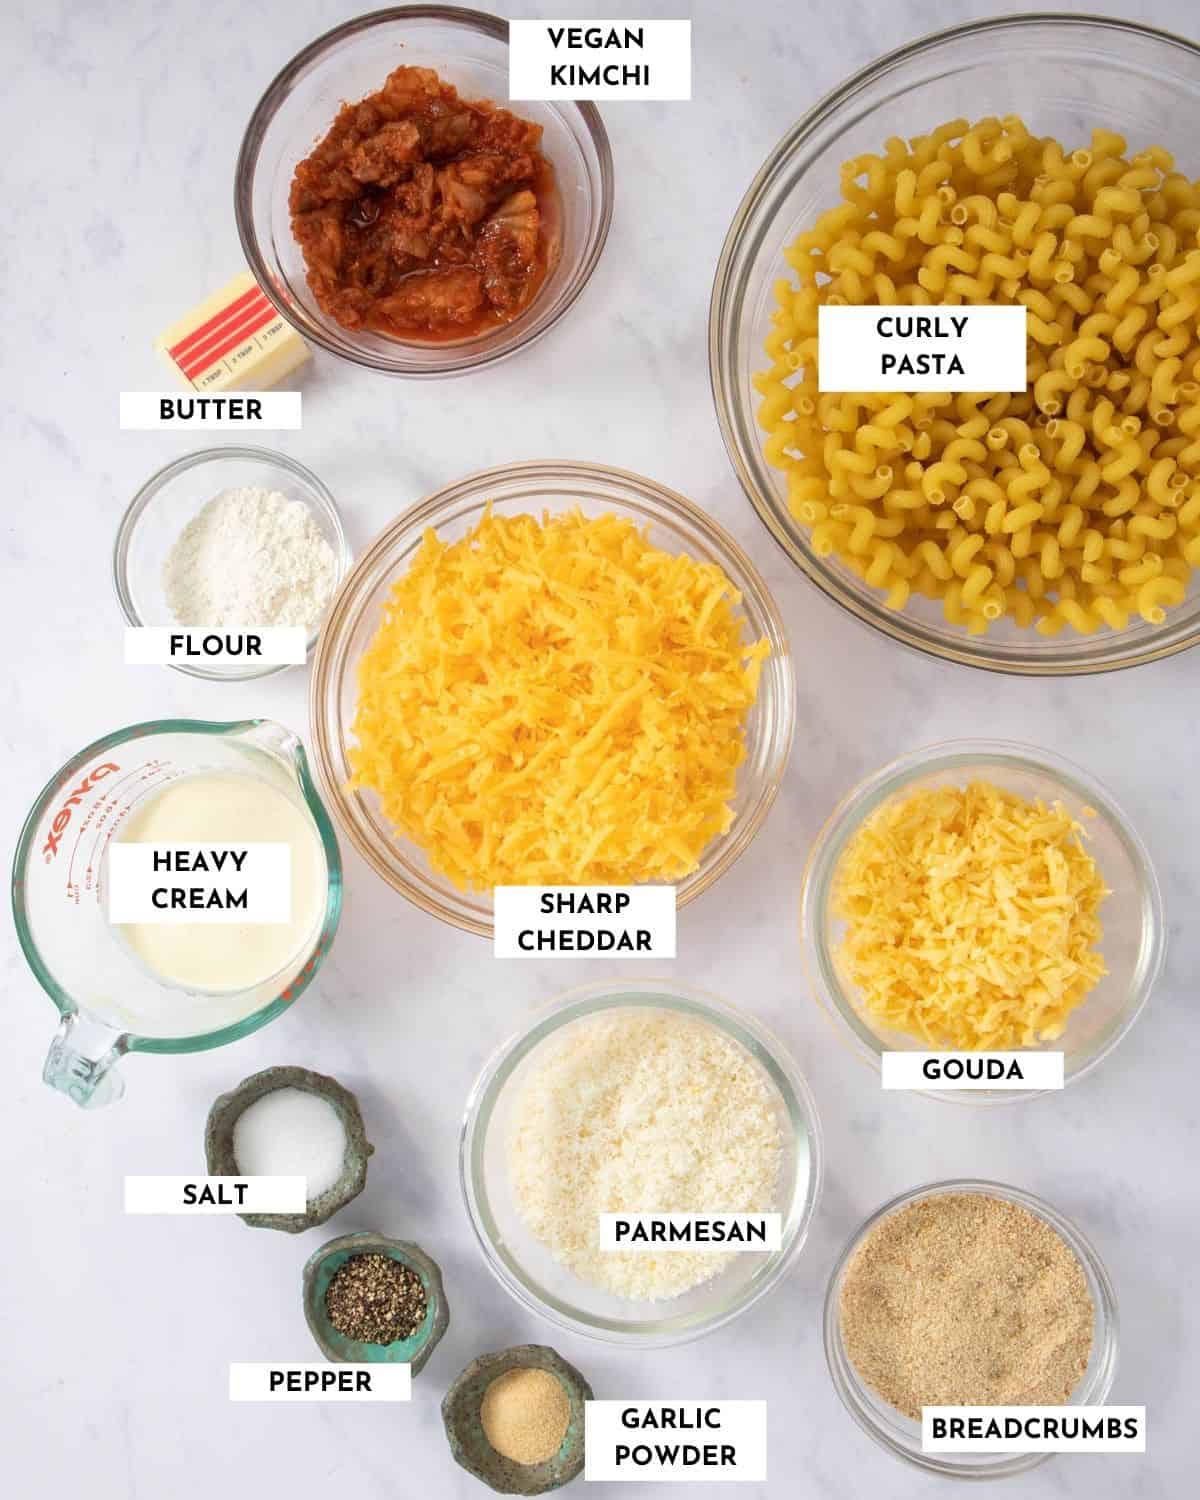
To make this kimchi mac and cheese, you’ll need short pasta, good quality vegan kimchi (both chopped kimchi and the kimchi juice), unsalted butter, cream, three types of cheese (sharp cheddar, gouda, and parmesan), garlic powder, salt and pepper.
Notes and Variations
Choice of pasta: I have used Cavatappi in this recipe, and I find that the shorter and curvier, the better for this recipe since it’ll soak up all the cheesiness. You can also fusilli, rotini, or macaroni, penne rigate in this recipe. For a healthier version, use spiralized zucchini noodles instead! If you’re gluten free, try this great gluten-free mac and cheese instead.Make this vegan. To make this recipe vegan, swap out the cheese for vegan alternatives (you can use vegan cheddar, parmesan and a cream cheese, instead of the gouda) Also make sure the kimchi is vegan! Type of kimchi. I have used a traditional Napa cabbage kimchi, but you can use any type of kimchi to make this recipe - just adjust how much you use depending on its spiciness. If you like kimchi, check out this cucumber kimchi!Mix-ins and toppings. I use Panko bread crumbs, but you can top this kimchi mac and cheese with a sprinkle of sesame seeds or sliced green onions. If you want to add some extra veggies, try stirring in broccoli, bell peppers, or mushrooms during the last few minutes of cooking time.
🥘 How to make kimchi mac and cheese
Start by boiling the pasta
Bring about 3 quarts of water to a boil (don’t forget to season with salt!) Add pasta to the boiling water and cook until al dente (following instructions on the package). Meanwhile, preheat the oven to 400°F.
Make the kimchi-roux and Mornay sauce
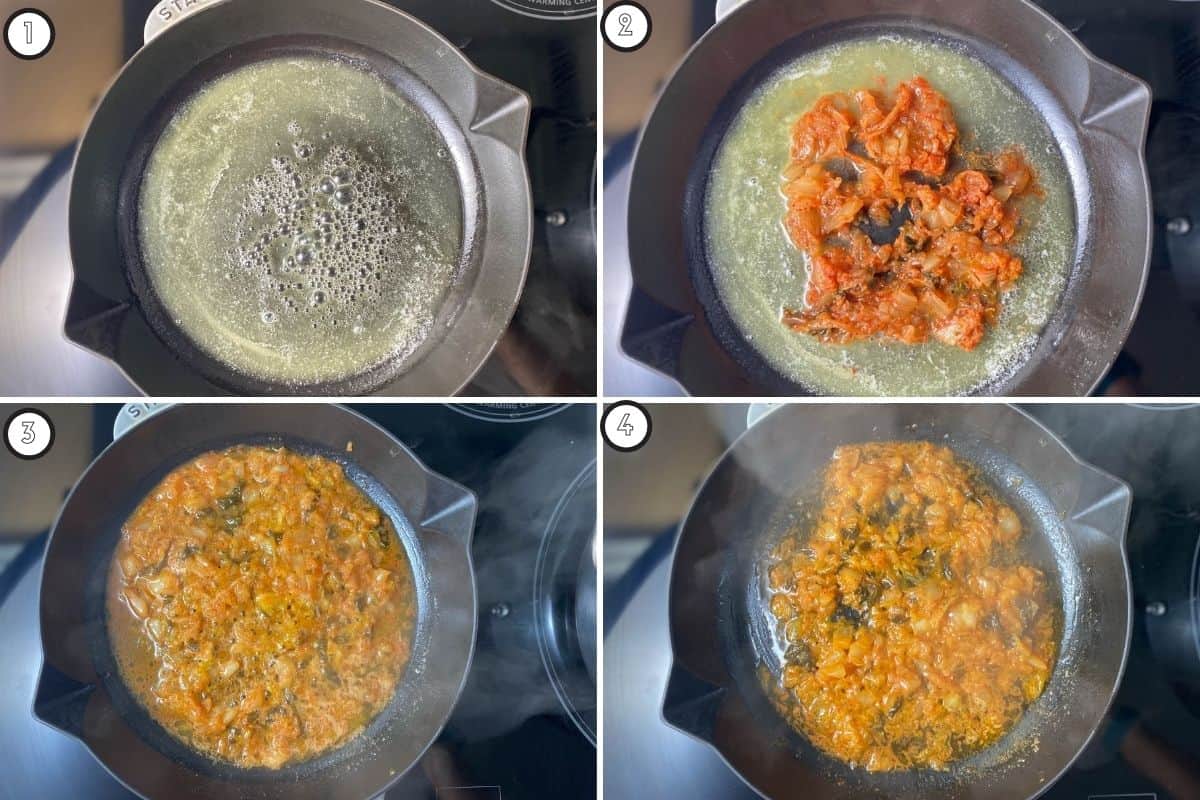
Start by melting some butter in a skillet over medium heat. Chop up kimchi finely and chopped kimchi (with the kimchi juice) to the melted butter. You’ll hear the sizzle because of the water in the kimchi. Sauté for about 5-6 minutes until the water in the kimchi reduces significantly.
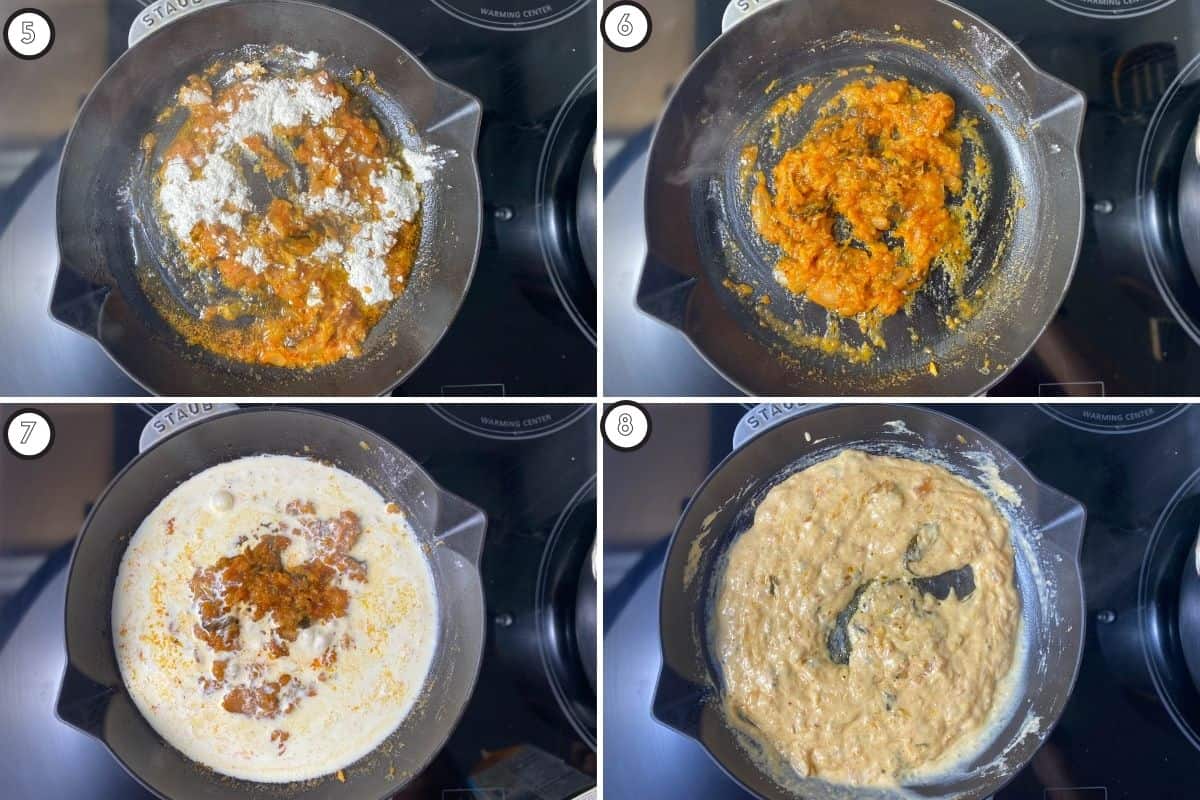
At this point, add flour and stir well to make a roux. Then, slowly add cream or milk to the skillet along with salt, pepper and garlic powder and whisk gently to create a béchamel.
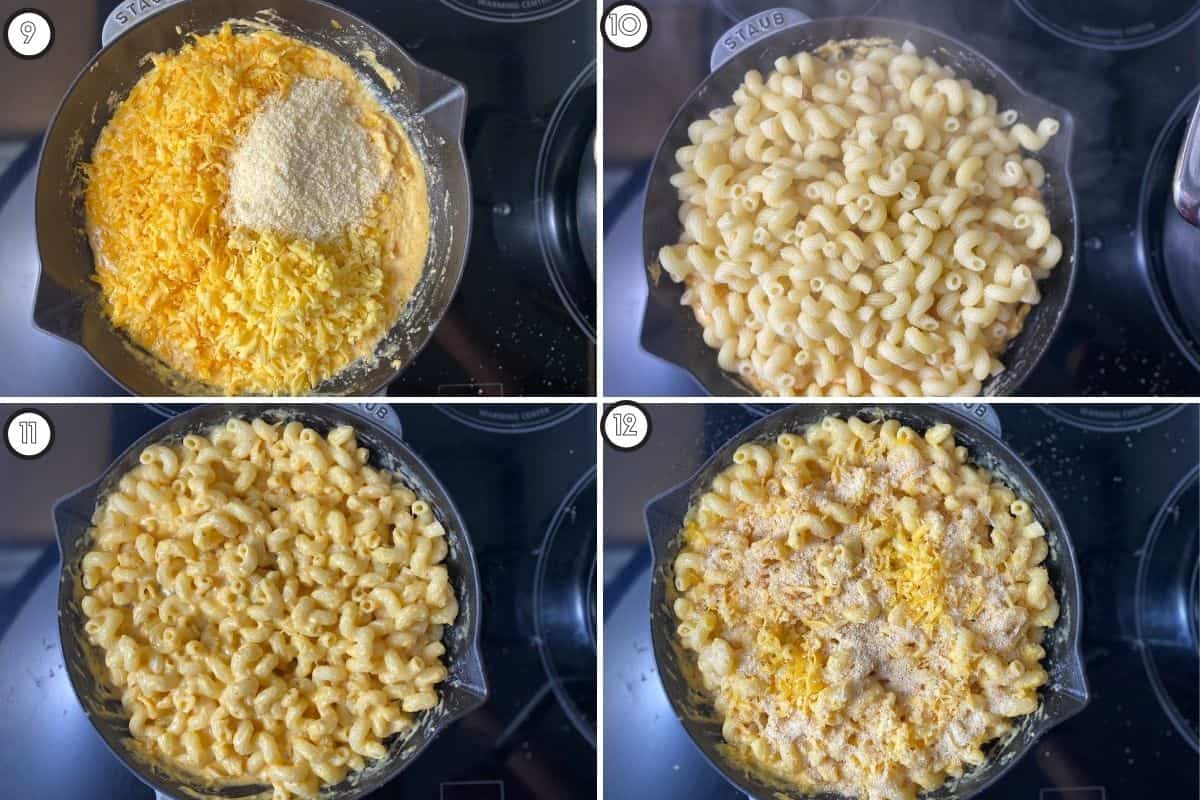
Drain the pasta and combine with the cheese sauce
Then, turn the heat to low and stir in all the gouda, and half of cheddar and parmesan to create the kimchi cheese sauce. Once the pasta is done cooking, drain the water (reserve a cup for later) and set aside. Let both the pasta and the cheese sauce cool for about 2-3 minutes. Then, add the cooked pasta to the cheese sauce, stirring well. If the resulting pasta needs a bit more fluid, add the pasta water slowly and mix.
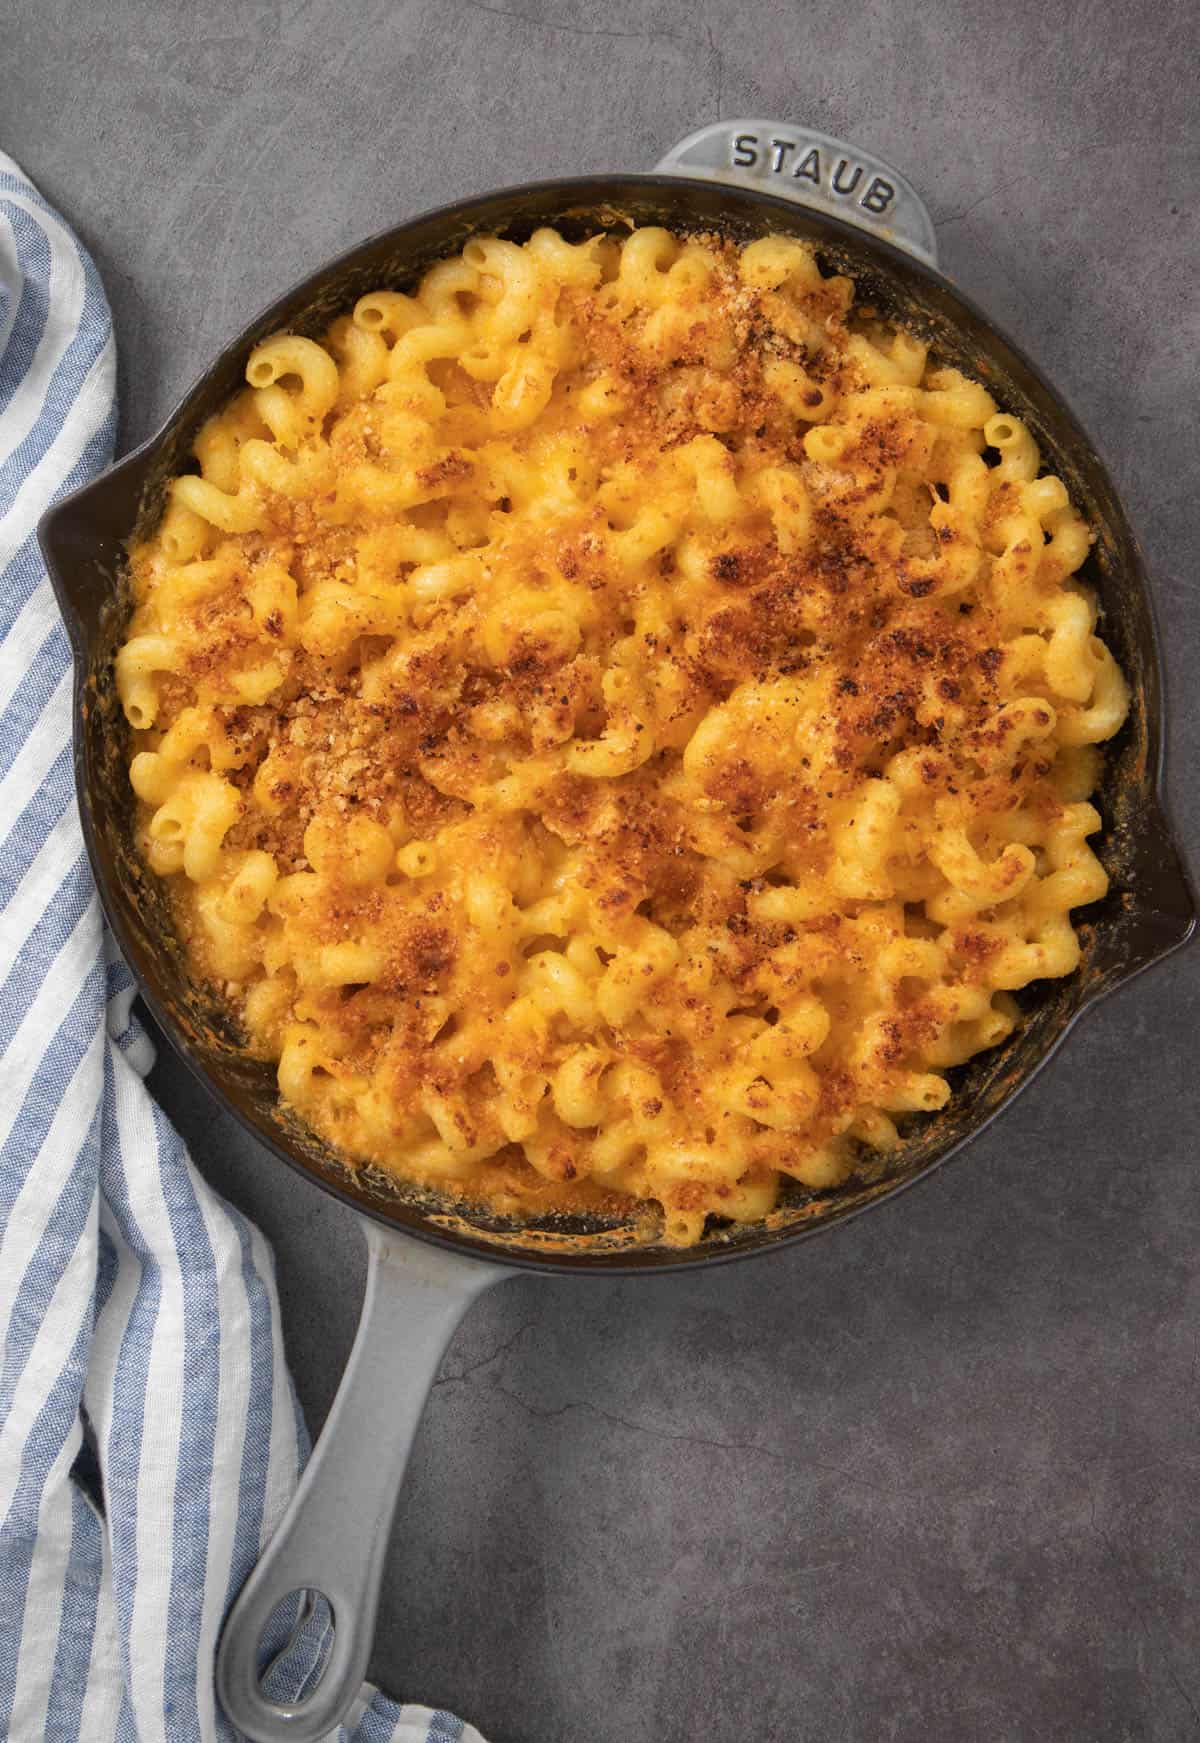
Top and broil for some delicious magic!
Remove the skillet from the heat. If you’re using a cast iron skillet, you can just add the remaining cheddar and parmesan along with Panko bread crumbs. If you’re using a regular pot, transfer the mac and cheese into an oven-safe baking dish. Pro-tip: Time to bring out those mini cocottes if you have any! Turn the oven to broil setting and pop the baking dish into the oven. Broil until the cheese on top has melted. You’re looking for a nice golden brown, takes about 2 minutes depending on your oven and broiler settings. Watch the broiler carefully while doing this though - you don’t want to burn it! Remove the baking dish or skillet from the oven, and let it rest for a minute or two! Your kimchi mac and cheese is ready for devouring.
👩🏽🍳 Top tips for the best kimchi mac and cheese!
For the best results, follow these four top tips for making a delicious and cheesy kimchi mac and cheese.
Taste test the kimchi before adding it to the dish, as some kimchis can be very spicy! If you’re not a fan of spicy foods, reduce the amount of kimchi used in the recipe.Grate your own cheese! Store-bought shredded or grated cheese typically have agents like potato starch added to them to prevent them from clumping. So they won’t melt as smoothly as fresh cheese. To get a perfect gooey cheese sauce, grate fresh cheese if you can!Sauté the kimchi in butter first to build the roux! To make sure you don’t overpower the mac and cheese with the fermented flavors, the key is to sauté the kimchi in butter (or a high fat oil like avocado oil). Then, you add flour to that mixture to make a roux. The flavors of the kimchi are better absorbed in the dish by doing it this way. Layer them thinly when you bake, and broil for a minute or two! This tip is inspired by Eduardo Jordan, one of my favorite Seattle chefs, and his recipe for mac and cheese. When you’re ready to bake, choose a baking dish or cast iron skillet that’s wide enough that you can have a thin but wide layer (i.e. no more than 1-2 noodles deep). Then, finally, finish with a quick broil to get the cheese nicely melted and absolutely delicious.
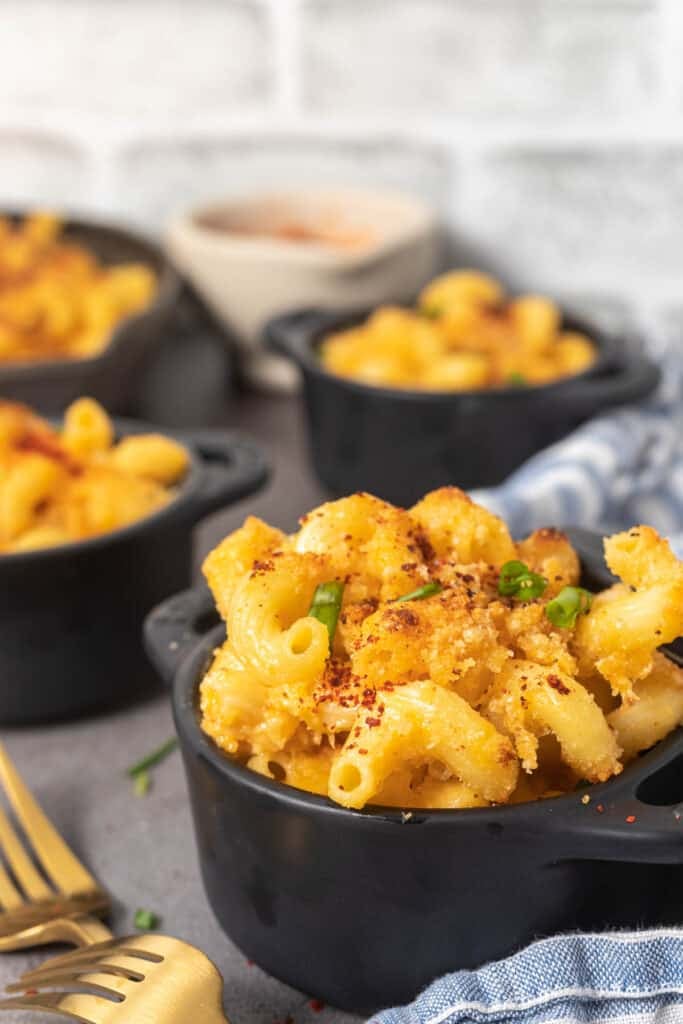
🍴 Serving and storage suggestions
This kimchi mac and cheese stays fresh in the fridge for a day or two after it’s made, but I highly recommend making it fresh whenever possible. I don’t recommend freezing the dish! You can serve this kimchi mac and cheese either as a side or as a main. If you’re using this as a side, serve it with this vegan turkey roast, stuffed acorn squash or this whole roasted cauliflower! If you want to use the kimchi mac and cheese as a cheesy main, serve it with a lemony garlic kale salad, some dinner rolls, or this refreshing cabbage slaw! Check out some of my other creamy, dreamy pasta recipes:
Gouda mac and cheese Authentic Italian cacio e pepeOne pot lemon ricotta pastaSpicy alfredo pasta Paccheri al Forno
If you tried this recipe, don’t forget to comment and rate! ⭐⭐⭐⭐⭐
📖 Recipe
Note: This recipe was originally published on February 17, 2020, and then updated on March 1, 2023 with more tips and tricks.